

This documentation details how to connect and disconnect the Optilogic MCP connector using Claude. To learn more about the Optilogic MCP Connector, please see The Optilogic MCP Connector Help Center article. It includes an explanation of what the connector is, how it can be used, example prompts, best practices, data handling and security details, and troubleshooting pointers.
The steps are dependent on the type of Claude account you are connecting: how to connect an individual account is first covered, followed by how to connect when your organization is on an Enterprise plan.
Any user can add the connector to their individual Claude account and authenticate with Optilogic directly — no admin setup required.
Step 1: Add the Connector
Navigate directly to https://claude.ai/directory/optilogic, and Click on the Connect to Claude button:
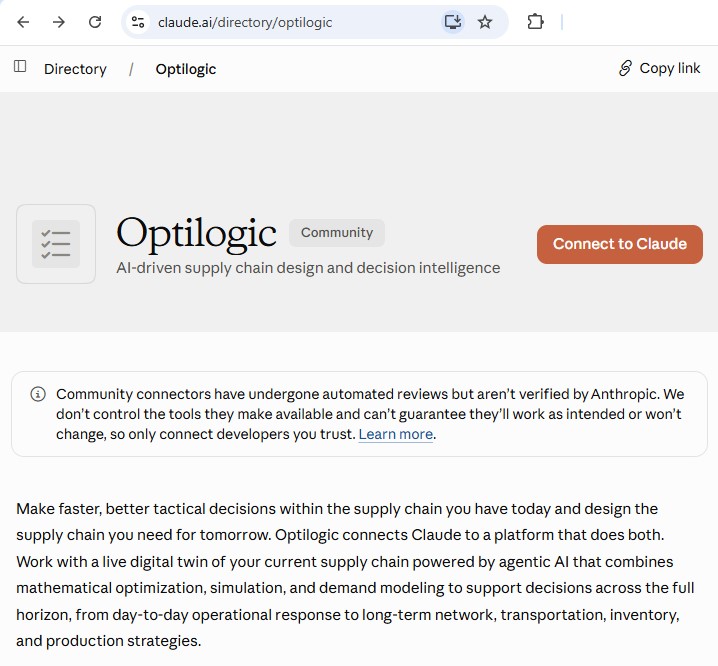
Alternatively, in Claude, go to Account > Settings > Connectors > Add (right-top) > Browse Connectors, search for "Optilogic", and click on the Optilogic connector that is found. Then click on Connect to Claude.
Step 2: Log In to Optilogic
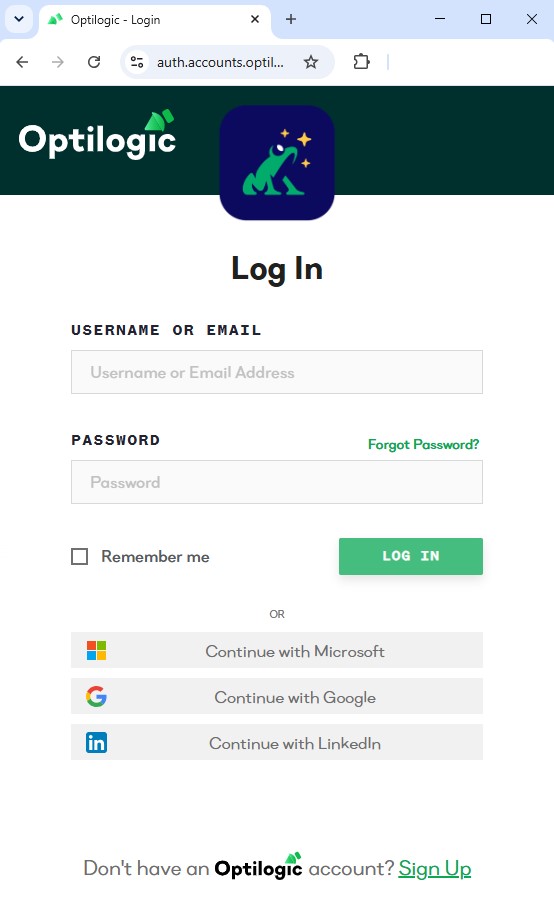
Clicking Connect to Claude redirects you to the Optilogic login screen. Sign in with your Optilogic credentials:
Step 3: Confirm the Connection
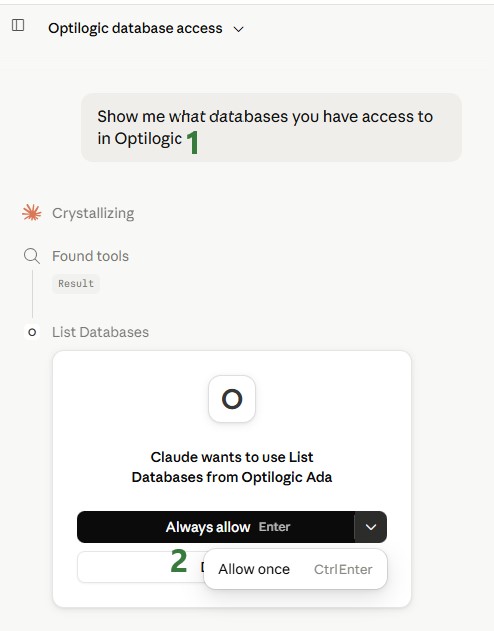
Once signed in, you are connected and you can close the Connectors screen. In a new Claude chat, try a test prompt to confirm everything is working: “Show me what databases you have access to in Optilogic.”:
Step 4: Allow Access
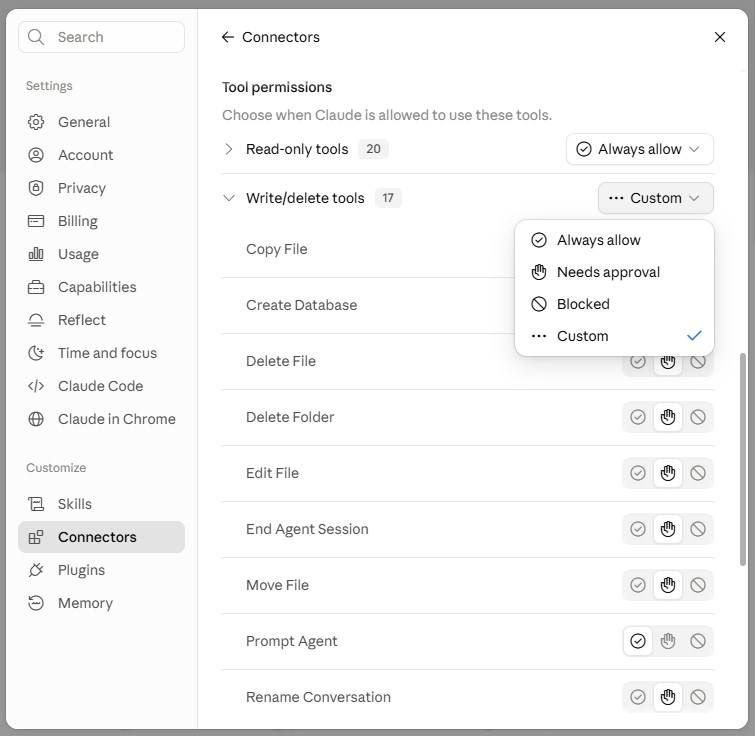
When Claude requests permission to use the connector choose to Always Allow, Allow once, or Deny.
To connect when on an Enterprise plan, your organization's IT department needs to take steps 1-4 below before individual users on the plan can start using the Optilogic connector (step 5 below).
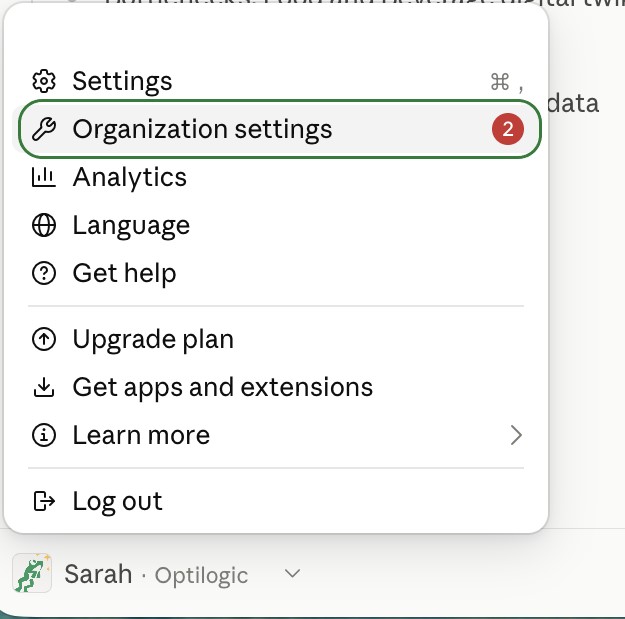
Step 1: Open Organization Settings
As an administrator of the Claude Enterprise plan, click on your username at the left bottom, and choose "Organization settings":
Step 2: Open the Connector Directory
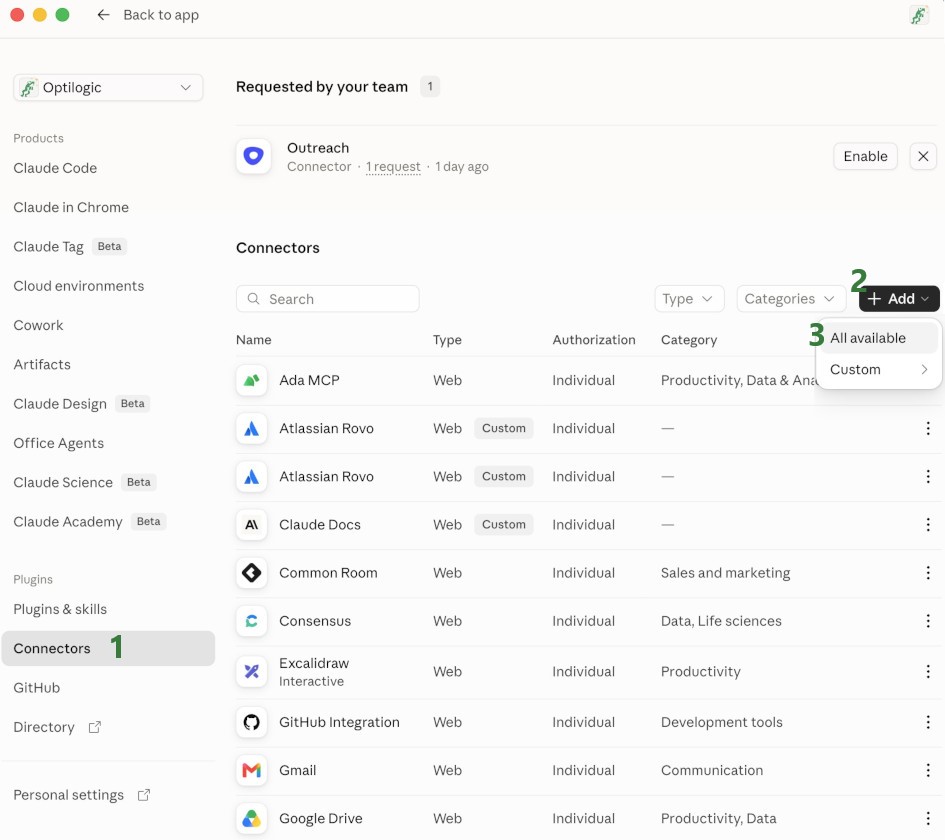
Navigate to Connectors in the Settings screen, then click on the "Add" button, and choose "All Available" to open the Connector Directory modal:
Step 3: Select the Optilogic Connector
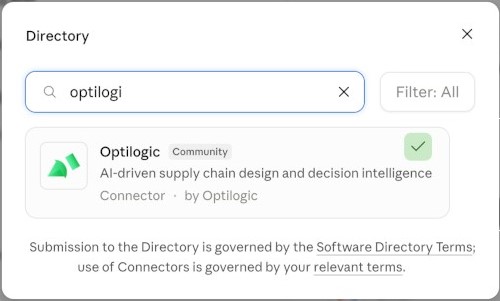
Search the directory for Optilogic and click on it to select it and see the listing details:
Step 4: Connect the Connector
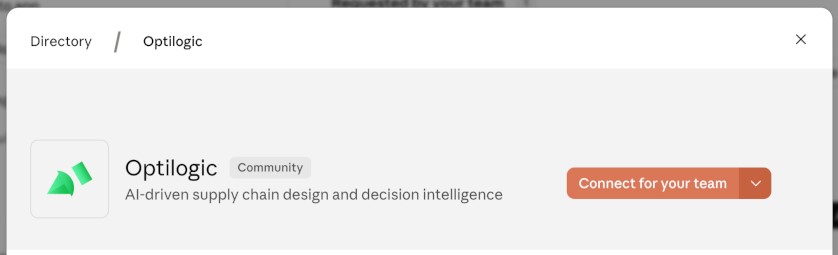
Press the "Connect for your team" button to add it:
Step 5: Users on the Enterprise Plan Connect
A user on the organization's Claude Enterprise plan can now connect by going to Settings > Connectors, and pressing the "Connect" button of the Optilogic connector:
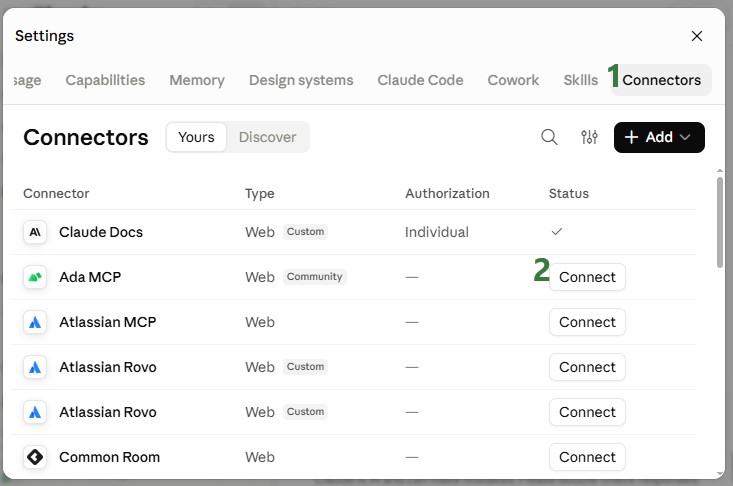
You will be prompted to authenticate with your Optilogic credentials, see also step 2 and onwards in the Individual Claude Account - Setting up the Connector section above.
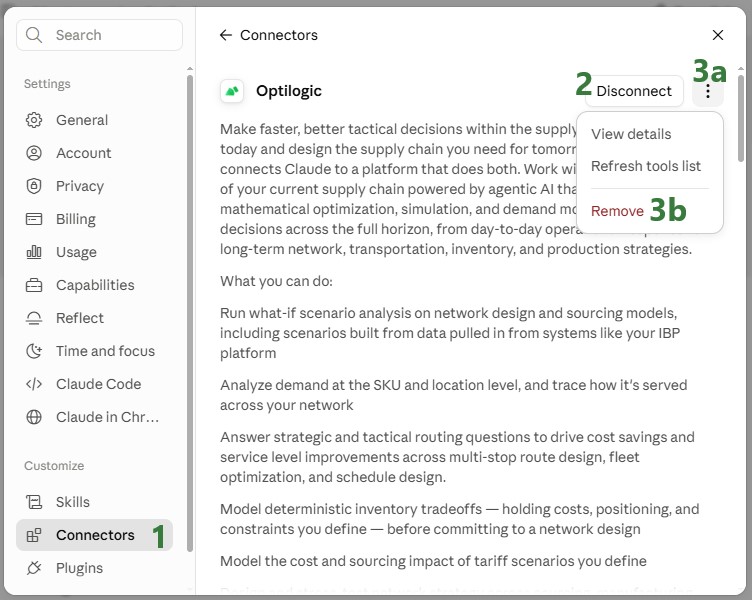
Should you need to disconnect or remove the Optilogic Connector, please take following steps:

This documentation details how to connect and disconnect the Optilogic MCP connector using Claude. To learn more about the Optilogic MCP Connector, please see The Optilogic MCP Connector Help Center article. It includes an explanation of what the connector is, how it can be used, example prompts, best practices, data handling and security details, and troubleshooting pointers.
The steps are dependent on the type of Claude account you are connecting: how to connect an individual account is first covered, followed by how to connect when your organization is on an Enterprise plan.
Any user can add the connector to their individual Claude account and authenticate with Optilogic directly — no admin setup required.
Step 1: Add the Connector
Navigate directly to https://claude.ai/directory/optilogic, and Click on the Connect to Claude button:
Alternatively, in Claude, go to Account > Settings > Connectors > Add (right-top) > Browse Connectors, search for "Optilogic", and click on the Optilogic connector that is found. Then click on Connect to Claude.
Step 2: Log In to Optilogic
Clicking Connect to Claude redirects you to the Optilogic login screen. Sign in with your Optilogic credentials:
Step 3: Confirm the Connection
Once signed in, you are connected and you can close the Connectors screen. In a new Claude chat, try a test prompt to confirm everything is working: “Show me what databases you have access to in Optilogic.”:
Step 4: Allow Access
When Claude requests permission to use the connector choose to Always Allow, Allow once, or Deny.
To connect when on an Enterprise plan, your organization's IT department needs to take steps 1-4 below before individual users on the plan can start using the Optilogic connector (step 5 below).
Step 1: Open Organization Settings
As an administrator of the Claude Enterprise plan, click on your username at the left bottom, and choose "Organization settings":
Step 2: Open the Connector Directory
Navigate to Connectors in the Settings screen, then click on the "Add" button, and choose "All Available" to open the Connector Directory modal:
Step 3: Select the Optilogic Connector
Search the directory for Optilogic and click on it to select it and see the listing details:
Step 4: Connect the Connector
Press the "Connect for your team" button to add it:
Step 5: Users on the Enterprise Plan Connect
A user on the organization's Claude Enterprise plan can now connect by going to Settings > Connectors, and pressing the "Connect" button of the Optilogic connector:
You will be prompted to authenticate with your Optilogic credentials, see also step 2 and onwards in the Individual Claude Account - Setting up the Connector section above.
Should you need to disconnect or remove the Optilogic Connector, please take following steps: