

This documentation details how to connect and disconnect the Optilogic MCP connector using ChatGPT. To learn more about the Optilogic MCP Connector, please see The Optilogic MCP Connector Help Center article. It includes an explanation of what the connector is, how it can be used, example prompts, best practices, data handling and security details, and troubleshooting pointers.
Any user can add the connector to their own ChatGPT account and authenticate with Optilogic directly — no admin setup required.
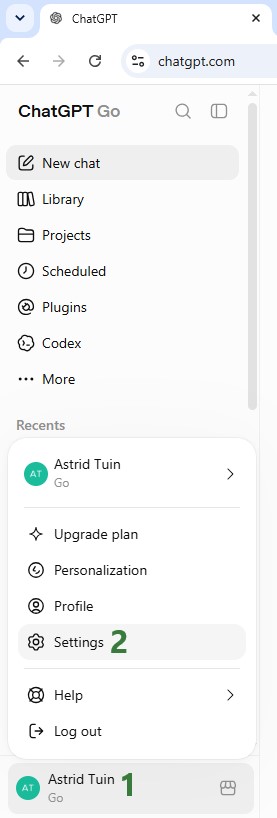
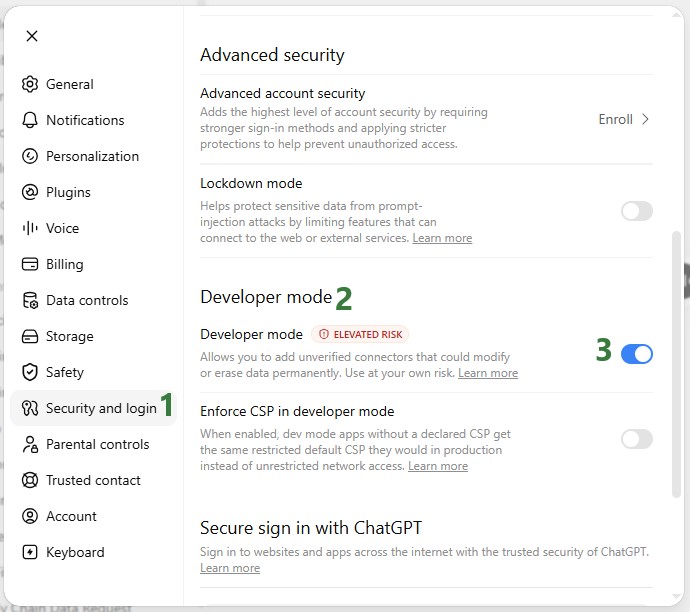
In ChatGPT, go to your Account > Settings > Security and login, or navigate directly to https://chatgpt.com/#settings/Security. Scroll down to Developer Mode and toggle it on:
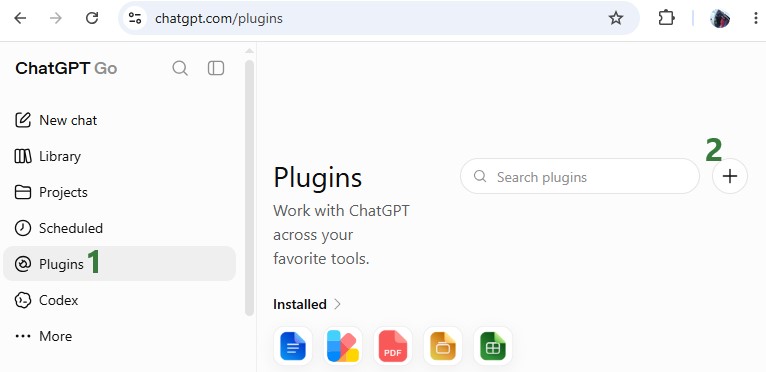
Go to Plugins in the menu at the top-left (or browse to https://chatgpt.com/plugins) and click the + icon in the top-right corner to add a new custom connector.
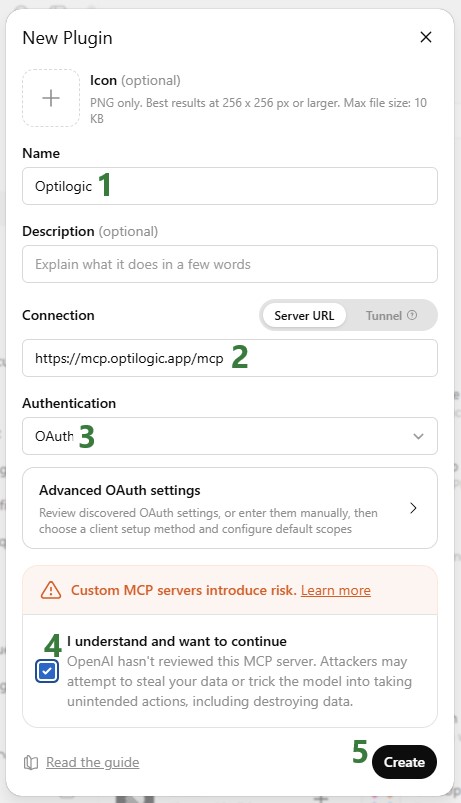
Complete the New Plugin form as follows:
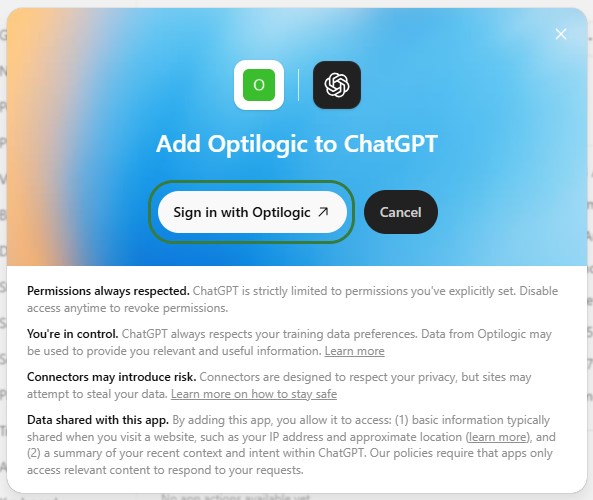
Clicking Create brings up an “Add Optilogic to ChatGPT” form, click on the “Sign in with Optilogic” button:
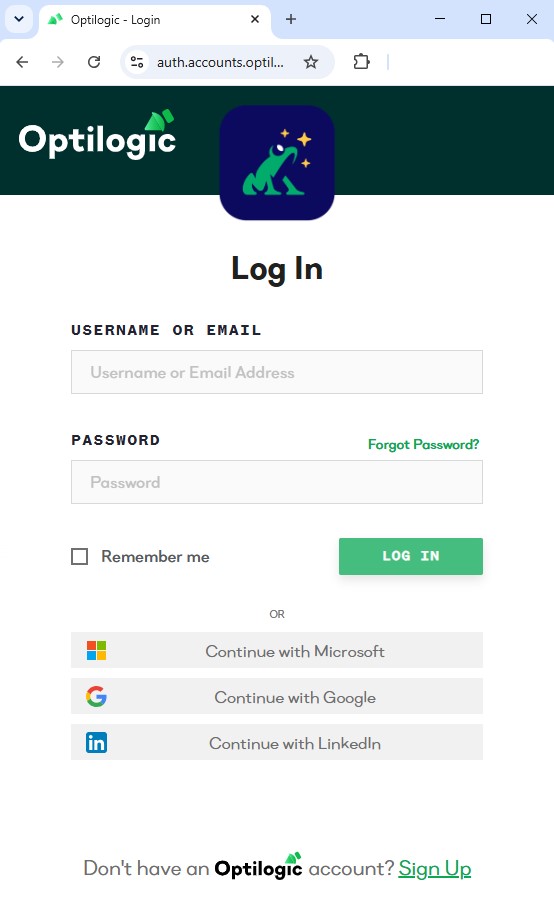
Complete the login with your Optilogic credentials:
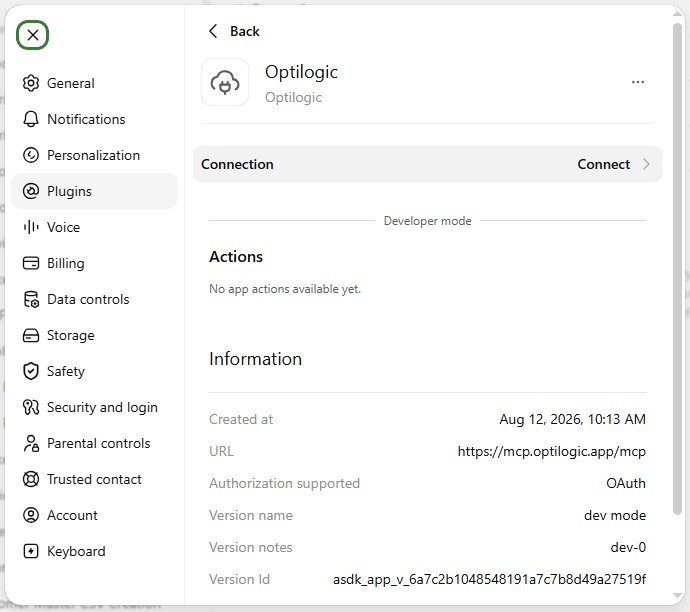
Once logged into Optilogic, the Plugins form in ChatGPT will show following. You do not need to do anything else and can close out of here by clicking on the x in the top-left corner:
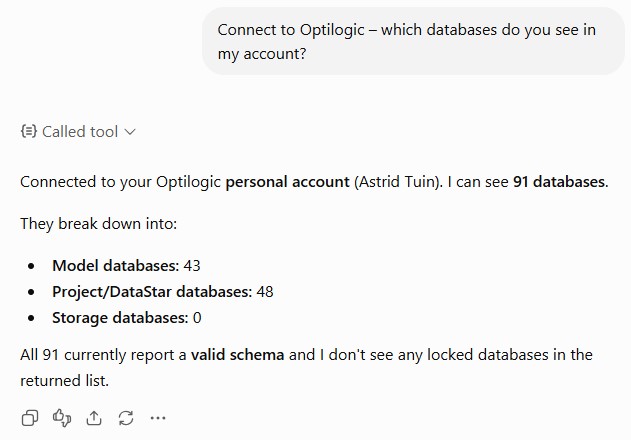
In a new ChatGPT conversation, ask it to use the connector. For example: “Connect to Optilogic – which databases do you see in my account?”. Success will look similar to the following prompt and response, confirming the MCP connection is live and authenticated correctly:
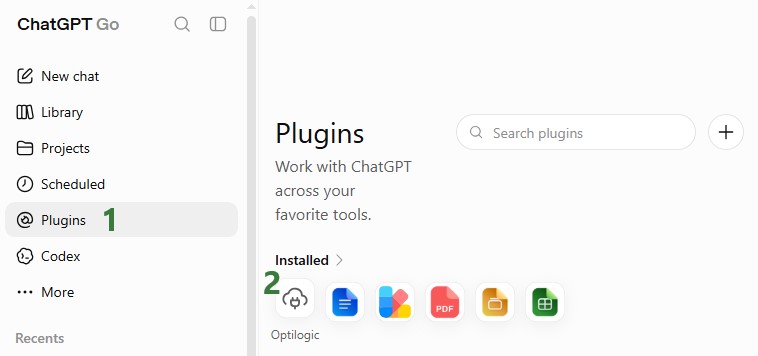
Should you need to disconnect from the Optilogic Connector, go to Plugins and click on the Optilogic connector in the list of Installed connectors:
Then click on the icon with 3 horizontal dots to open a context menu and choose Uninstall from this menu:
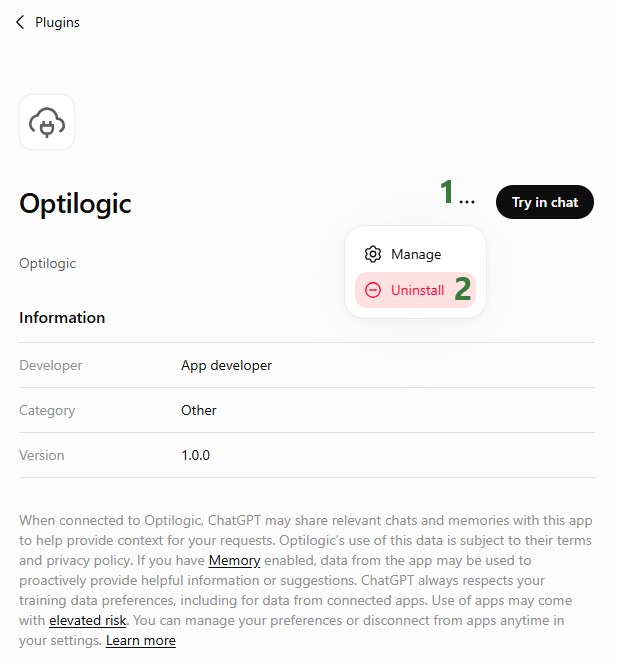
Please note that the connector will be uninstalled immediately without asking to confirm.
Use the steps outlined in the “Setting up the Connector” section above to re-connect to the Optilogic connector.

This documentation details how to connect and disconnect the Optilogic MCP connector using ChatGPT. To learn more about the Optilogic MCP Connector, please see The Optilogic MCP Connector Help Center article. It includes an explanation of what the connector is, how it can be used, example prompts, best practices, data handling and security details, and troubleshooting pointers.
Any user can add the connector to their own ChatGPT account and authenticate with Optilogic directly — no admin setup required.
In ChatGPT, go to your Account > Settings > Security and login, or navigate directly to https://chatgpt.com/#settings/Security. Scroll down to Developer Mode and toggle it on:
Go to Plugins in the menu at the top-left (or browse to https://chatgpt.com/plugins) and click the + icon in the top-right corner to add a new custom connector.
Complete the New Plugin form as follows:
Clicking Create brings up an “Add Optilogic to ChatGPT” form, click on the “Sign in with Optilogic” button:
Complete the login with your Optilogic credentials:
Once logged into Optilogic, the Plugins form in ChatGPT will show following. You do not need to do anything else and can close out of here by clicking on the x in the top-left corner:
In a new ChatGPT conversation, ask it to use the connector. For example: “Connect to Optilogic – which databases do you see in my account?”. Success will look similar to the following prompt and response, confirming the MCP connection is live and authenticated correctly:
Should you need to disconnect from the Optilogic Connector, go to Plugins and click on the Optilogic connector in the list of Installed connectors:
Then click on the icon with 3 horizontal dots to open a context menu and choose Uninstall from this menu:
Please note that the connector will be uninstalled immediately without asking to confirm.
Use the steps outlined in the “Setting up the Connector” section above to re-connect to the Optilogic connector.