

This documentation details how to connect and disconnect the Optilogic MCP connector using Copilot. To learn more about the Optilogic MCP Connector, please see The Optilogic MCP Connector Help Center article. It includes an explanation of what the connector is, how it can be used, example prompts, best practices, data handling and security details, and troubleshooting pointers.
The steps to take when connecting to the Optilogic MCP Connector in Copilot are as follows:
These steps are covered in detail in the next sections.
The following steps to create an MCP agent need to be completed by an IT administrator.
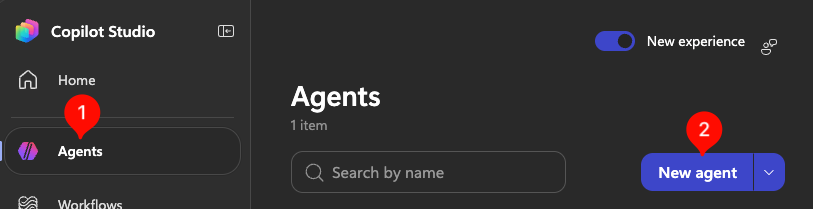
Navigate to Copilot Studio (https://copilotstudio.microsoft.com/), and Open the Agents page. Then, choose New Agent:
Provide a name for your agent, for example, Optilogic MCP.
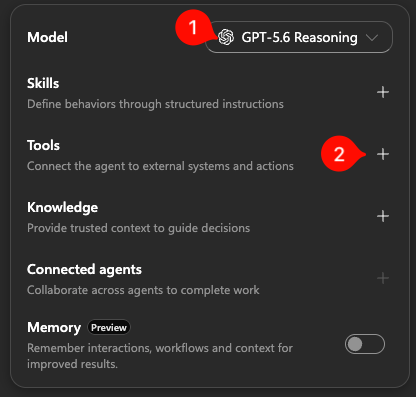
Choose a model to leverage from the drop-down list. As of August 2026, GPT 5.6 Reasoning works well; other models may work fine too. Once you have chosen your model, open the Tools menu by clicking on the plus button to the right:
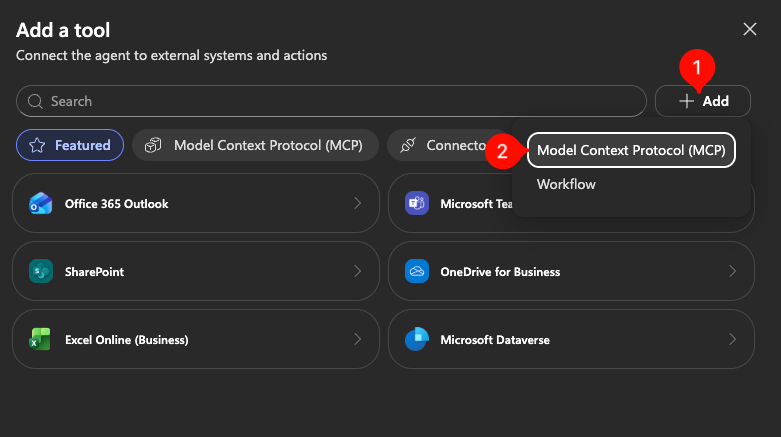
In the Tools menu, click on the Add button, then select Model Context Protocol (MCP):
In the Add MCP server form that comes up, enter the following:
Once added, provide some basic instructions for the agent such as “You are an agent designed to assist with Ada in the Optilogic platform.”.
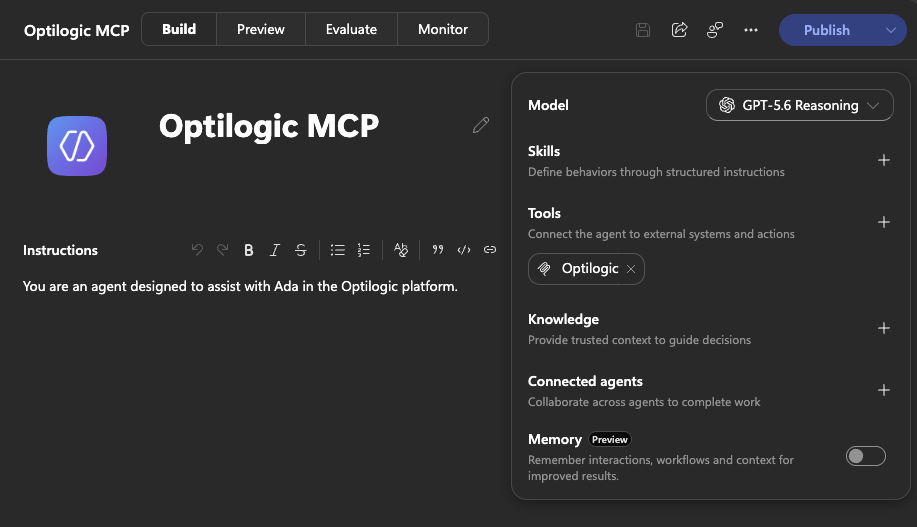
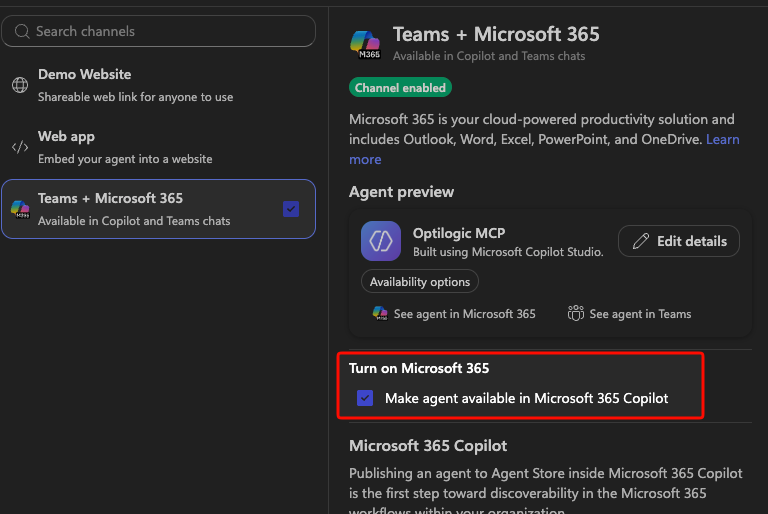
Save and publish the agent. The Save button is just left of the publish button; next, click on Publish. Upon publishing a window will pop up with final settings. Be sure to check the box to make the agent available in Microsoft 365 Copilot:
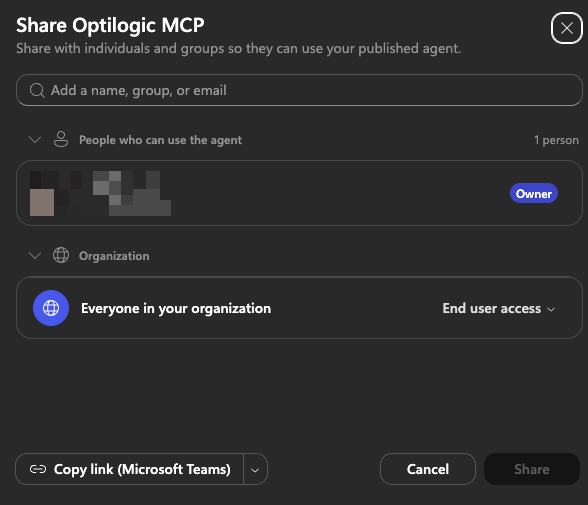
Still on the same form, click on the Availability options button, scroll to the bottom of the menu, and click on the Share Agent button to choose which users can access the agent. Alternatively, you can select the Share Agent button and enable end-user access for all users in the organization:
Finally, you will need to associate a Microsoft Power Platform billing profile to agents created in Copilot Studio for the agent to function. Copilot agents require credits separate from end-user Copilot licensing. To explore current offerings from Microsoft and manage billing profiles, please see this webpage.
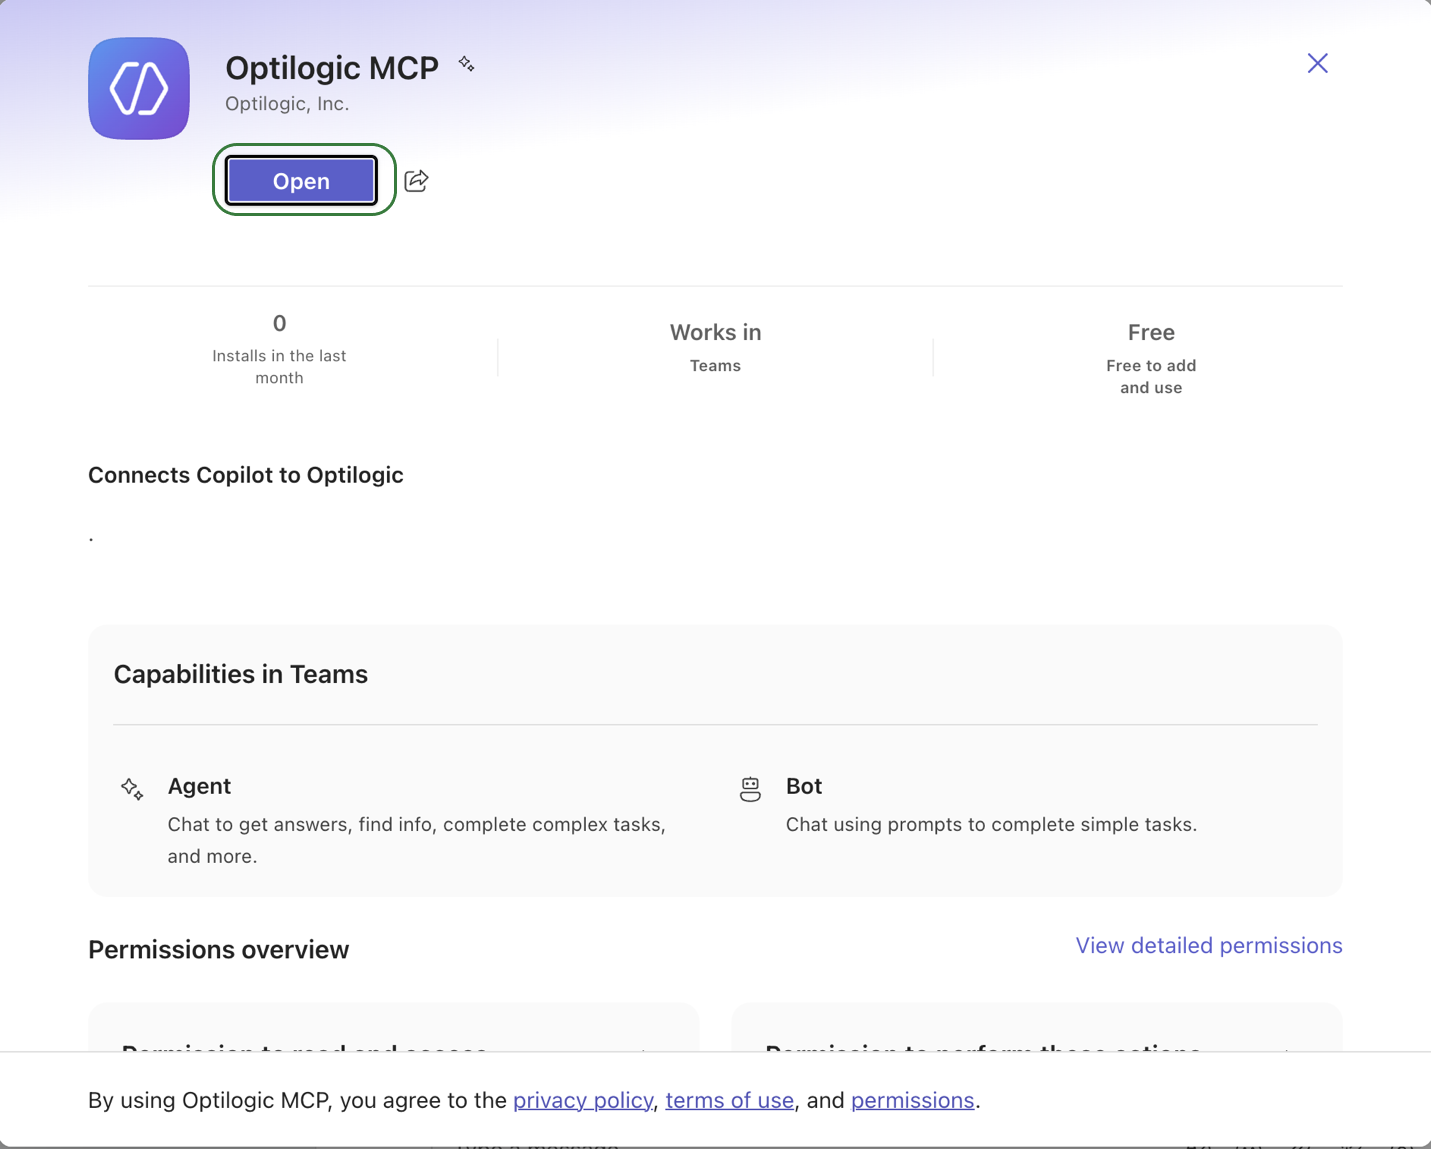
Once IT creates the agent on your company’s Copilot account, they can share a link with you to the new agent, which will look similar to the next screenshot. Click on the Open button.
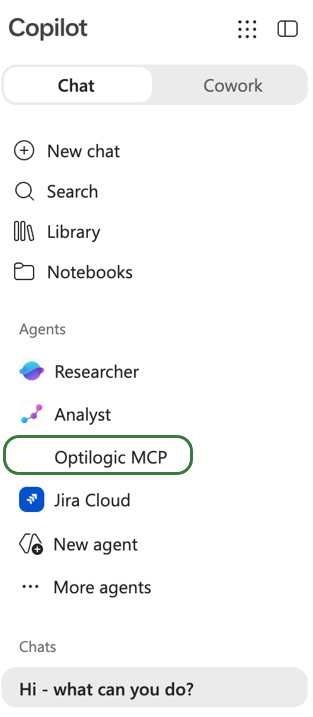
The agent will be added to your Copilot account to chat with – notice it under Agents in the left pane:
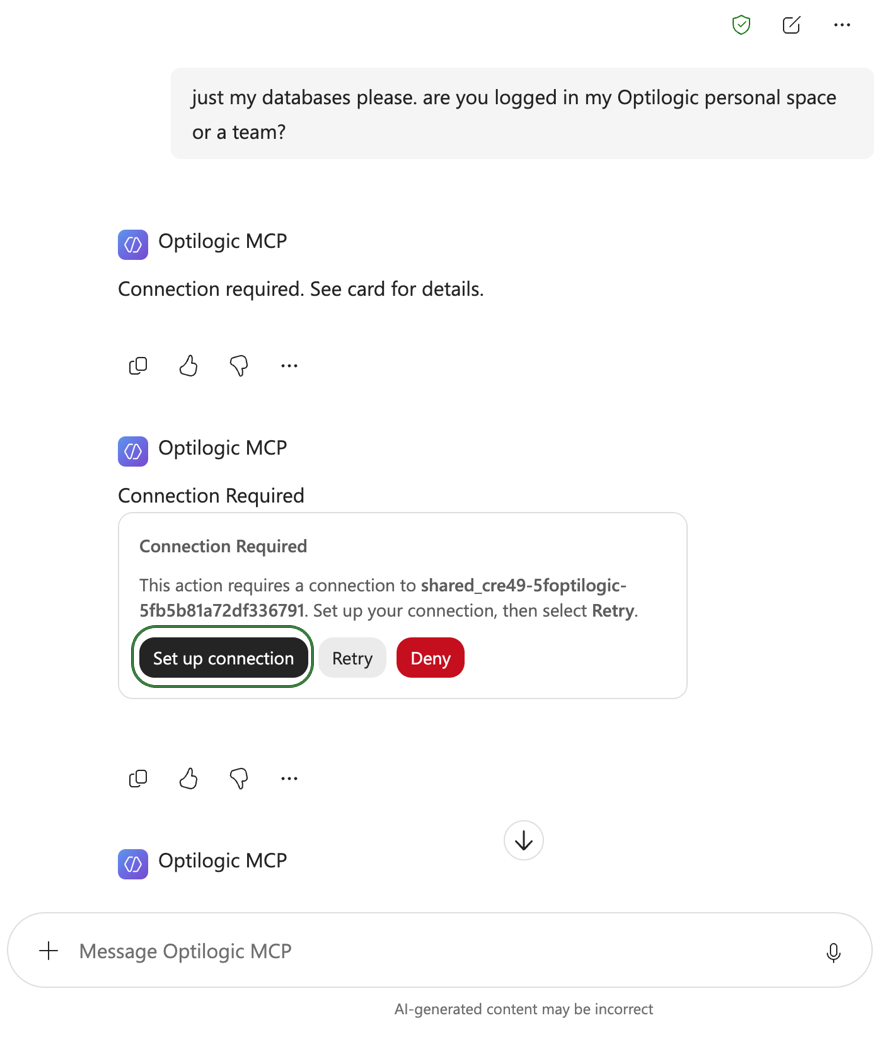
Start a chat with the agent and prompt it to connect to your Optilogic account. When you see the card for Connection Required, click on Set up connection:
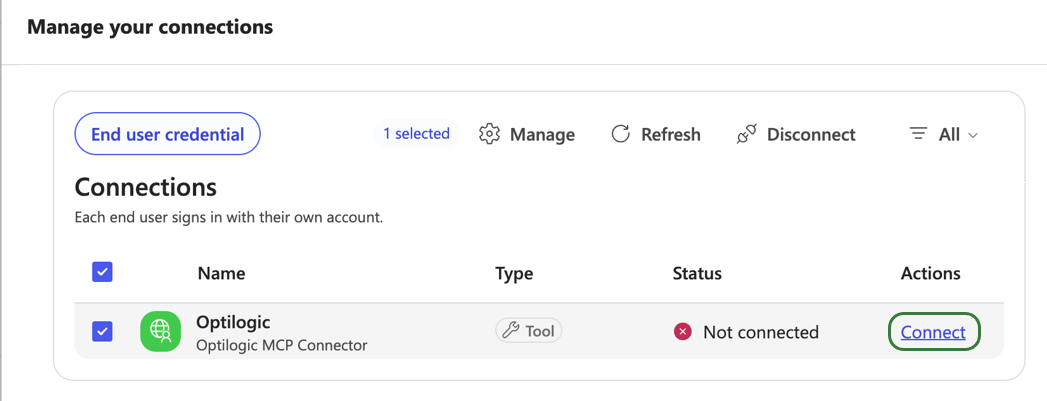
A browser window will open. Click on Connect under Actions:
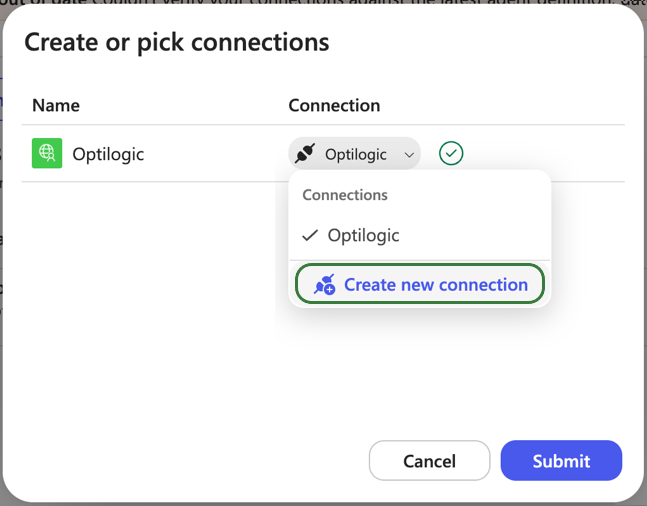
In the Connection drop-down list, select Create new connection:
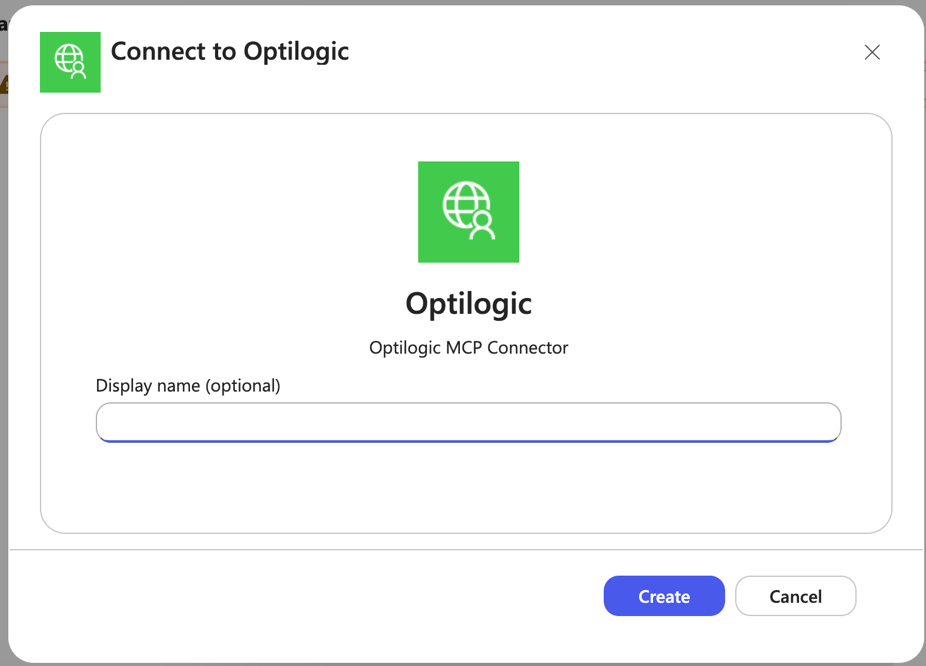
Enter a display name and click on Create:
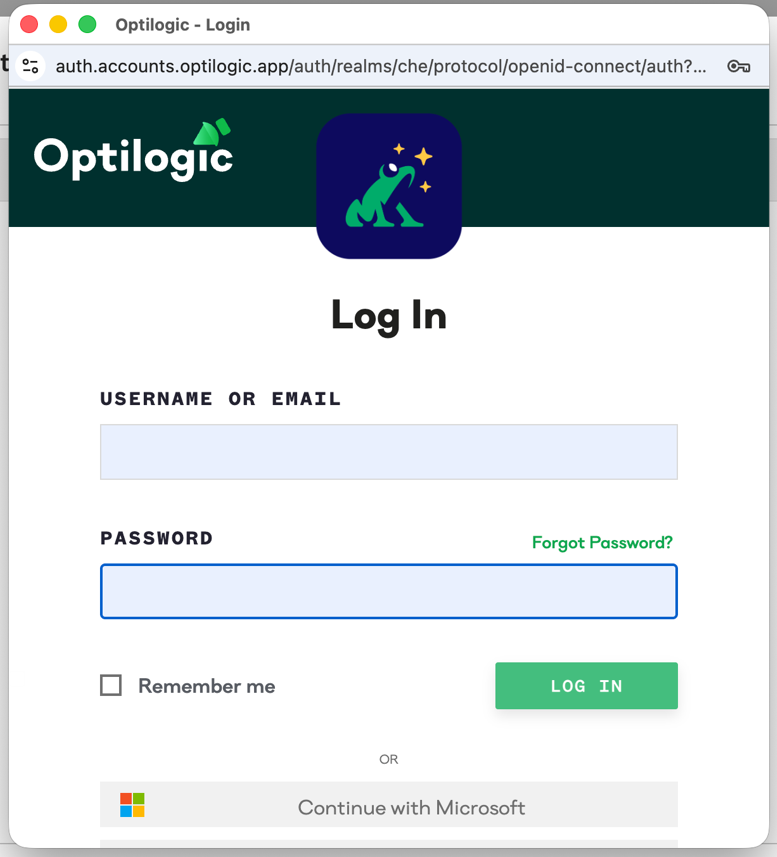
When prompted, sign in to your Optilogic account:
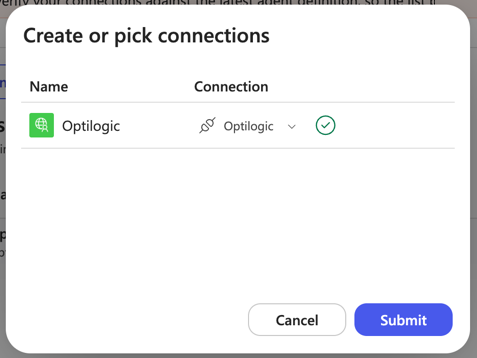
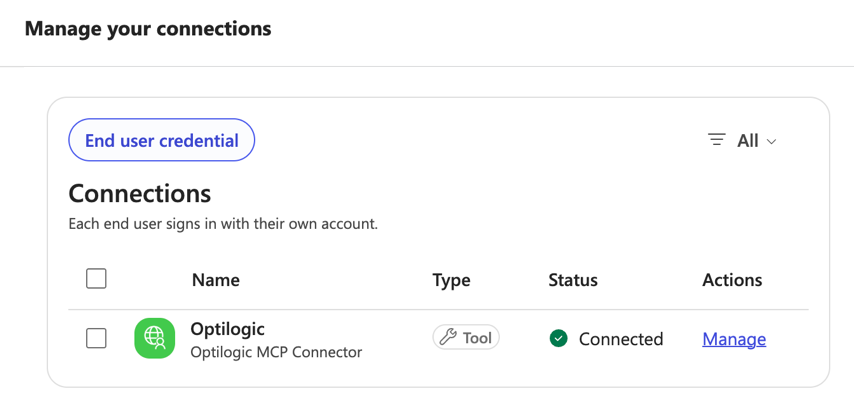
The connection is complete! You will see the checkmark for confirmation:
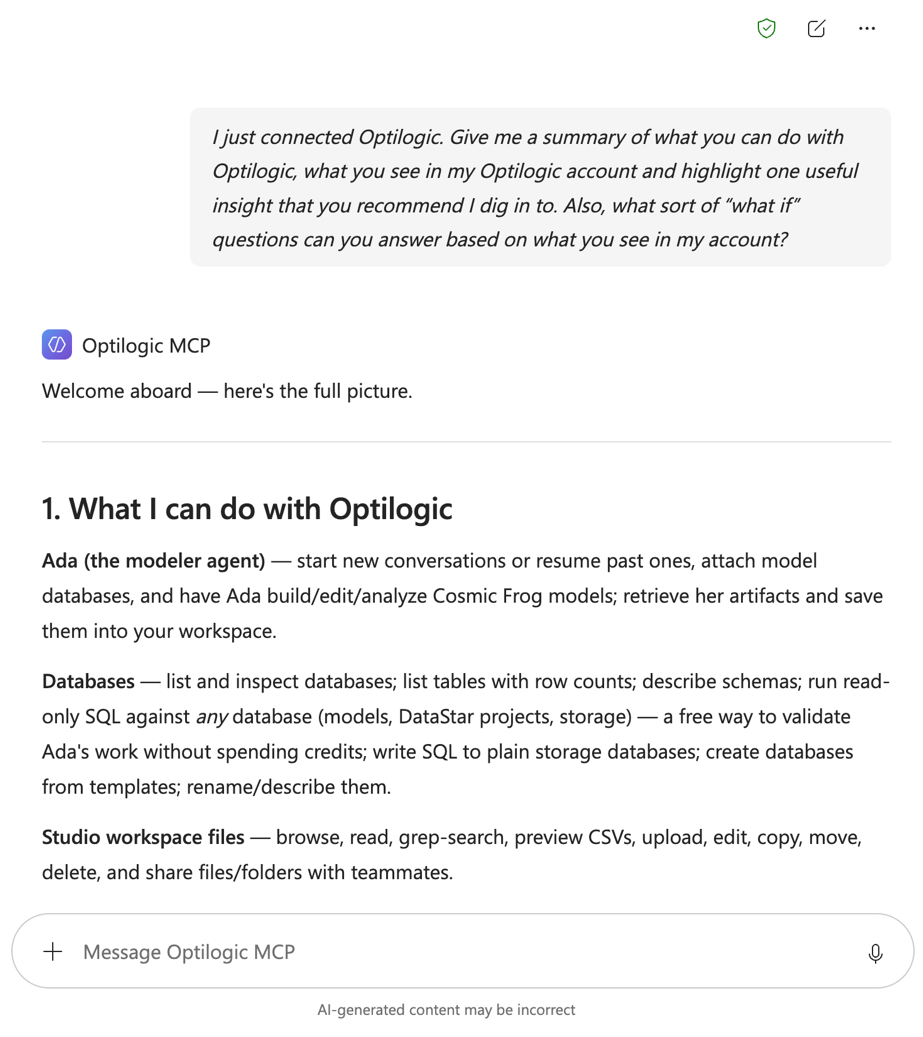
Go back to your Copilot chat window and test it out with a first prompt, such as: I just connected Optilogic. Give me a summary of what you can do with Optilogic, what you see in my Optilogic account and highlight one useful insight that you recommend I dig in to. Also, what sort of “what if” questions can you answer based on what you see in my account?.

This documentation details how to connect and disconnect the Optilogic MCP connector using Copilot. To learn more about the Optilogic MCP Connector, please see The Optilogic MCP Connector Help Center article. It includes an explanation of what the connector is, how it can be used, example prompts, best practices, data handling and security details, and troubleshooting pointers.
The steps to take when connecting to the Optilogic MCP Connector in Copilot are as follows:
These steps are covered in detail in the next sections.
The following steps to create an MCP agent need to be completed by an IT administrator.
Navigate to Copilot Studio (https://copilotstudio.microsoft.com/), and Open the Agents page. Then, choose New Agent:
Provide a name for your agent, for example, Optilogic MCP.
Choose a model to leverage from the drop-down list. As of August 2026, GPT 5.6 Reasoning works well; other models may work fine too. Once you have chosen your model, open the Tools menu by clicking on the plus button to the right:
In the Tools menu, click on the Add button, then select Model Context Protocol (MCP):
In the Add MCP server form that comes up, enter the following:
Once added, provide some basic instructions for the agent such as “You are an agent designed to assist with Ada in the Optilogic platform.”.
Save and publish the agent. The Save button is just left of the publish button; next, click on Publish. Upon publishing a window will pop up with final settings. Be sure to check the box to make the agent available in Microsoft 365 Copilot:
Still on the same form, click on the Availability options button, scroll to the bottom of the menu, and click on the Share Agent button to choose which users can access the agent. Alternatively, you can select the Share Agent button and enable end-user access for all users in the organization:
Finally, you will need to associate a Microsoft Power Platform billing profile to agents created in Copilot Studio for the agent to function. Copilot agents require credits separate from end-user Copilot licensing. To explore current offerings from Microsoft and manage billing profiles, please see this webpage.
Once IT creates the agent on your company’s Copilot account, they can share a link with you to the new agent, which will look similar to the next screenshot. Click on the Open button.
The agent will be added to your Copilot account to chat with – notice it under Agents in the left pane:
Start a chat with the agent and prompt it to connect to your Optilogic account. When you see the card for Connection Required, click on Set up connection:
A browser window will open. Click on Connect under Actions:
In the Connection drop-down list, select Create new connection:
Enter a display name and click on Create:
When prompted, sign in to your Optilogic account:
The connection is complete! You will see the checkmark for confirmation:
Go back to your Copilot chat window and test it out with a first prompt, such as: I just connected Optilogic. Give me a summary of what you can do with Optilogic, what you see in my Optilogic account and highlight one useful insight that you recommend I dig in to. Also, what sort of “what if” questions can you answer based on what you see in my account?.