

Exciting tools that drastically shorten the time spent wrangling data, building supply chain models for Cosmic Frog, and analyzing outputs of these models are now available on the Optilogic platform.
Collectively, the Optilogic agentic AI tools are called Ada. This is after Ada Lovelace, widely regarded as the world’s first computer programmer and one of the earliest visionaries to recognize the potential of computational systems beyond pure calculation.
This documentation briefly explains how to access these AI Agents and Utilities, lists the available tools with a short description of each, and provides links to detailed documentation for several of these tools.
Before we dive into how to access the AI Agents & Utilities, here are a few links you may find helpful:
Four of the available agents can be accessed by chatting with Ada and all of them can be accessed by using Run AI Agent tasks in DataStar.
When chatting with Ada on the next generation Optilogic platform, users can select the agent they want to use for their prompt:
Please note that:
Please refer to the detailed documentation on the individual agents and the getting started with Ada & Agentic AI article to learn more about using these when chatting with Ada.
At a high level, the steps in DatsStar are as follows (screenshots follow beneath):
Your macro canvas will look similar to the following screenshot after step #4:
After adding a task, its configuration tab is automatically shown on the right-hand side. Give the task a name, and then select the Agent you want to use from the list of available Agents in the Select Utility section. You can also use the Search box to quickly find any Agent that contains certain text in its name or description. Hover over the description of an Agent to see the full description in case it is not entirely visible:
Once an Agent has been selected by clicking on it, the Configure Utility section becomes available. The inputs here will differ based on the Agent/Utility that has been selected. In the next screenshot the Configure Utility section of the Modeler Agent is shown:
Provide the inputs for at least the required parameters, and if desired for any optional ones. Note that hovering over a blue question mark icon will bring up a hover box with a description of the parameter.
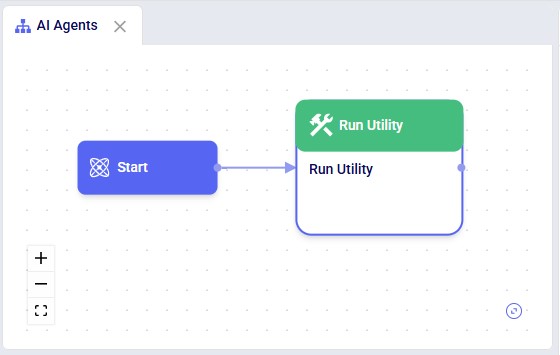
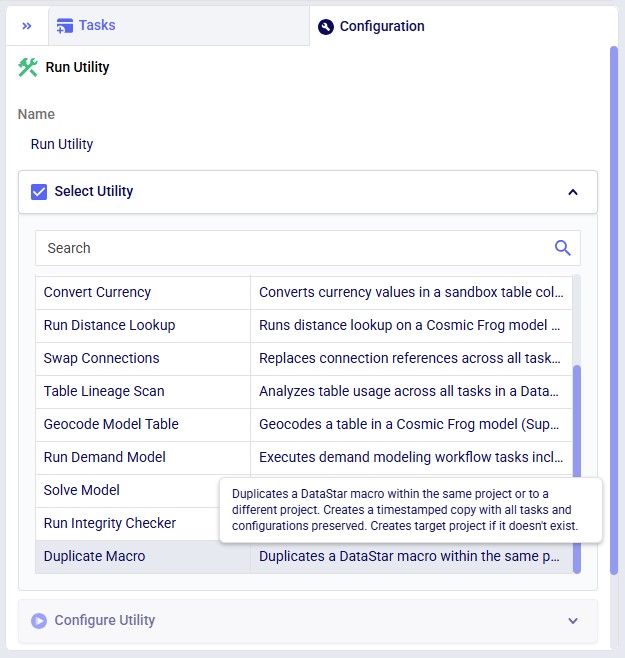
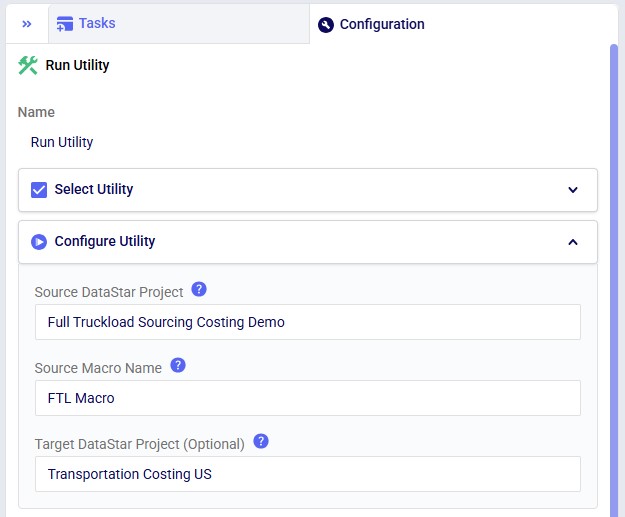
Using Utilities works in the same way as using AI Agents, just through the Run Utility task instead of the Run AI Agent task. The following 3 screenshots show 1) a Run Utility task added to a Macro, 2) its Select Utility section, and 3) the Configure Utility section of the Duplicate Macro utility:
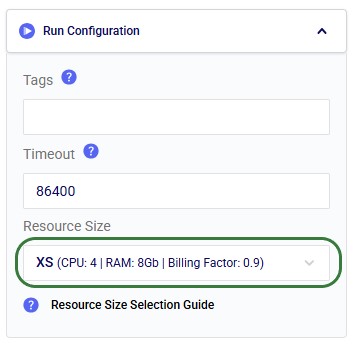
Resource Size for both Run AI Agent and Run Utility tasks can be set in the Run Configuration section, which is indicated as optional. However, for most agents and utilities, the default 3XS Resource Size is not sufficient. It is recommended to update this to XS:
The folloing AI Agents and Utilities are currently available. More are being added as they come available. For each a short description is given and for those that have more detailed documentation to go with them, a link to this documentation is included.

Exciting tools that drastically shorten the time spent wrangling data, building supply chain models for Cosmic Frog, and analyzing outputs of these models are now available on the Optilogic platform.
Collectively, the Optilogic agentic AI tools are called Ada. This is after Ada Lovelace, widely regarded as the world’s first computer programmer and one of the earliest visionaries to recognize the potential of computational systems beyond pure calculation.
This documentation briefly explains how to access these AI Agents and Utilities, lists the available tools with a short description of each, and provides links to detailed documentation for several of these tools.
Before we dive into how to access the AI Agents & Utilities, here are a few links you may find helpful:
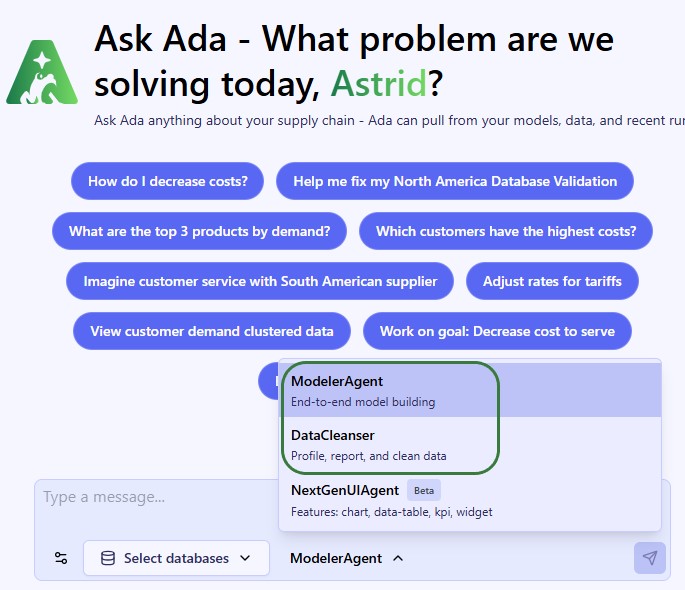
Four of the available agents can be accessed by chatting with Ada and all of them can be accessed by using Run AI Agent tasks in DataStar.
When chatting with Ada on the next generation Optilogic platform, users can select the agent they want to use for their prompt:
Please note that:
Please refer to the detailed documentation on the individual agents and the getting started with Ada & Agentic AI article to learn more about using these when chatting with Ada.
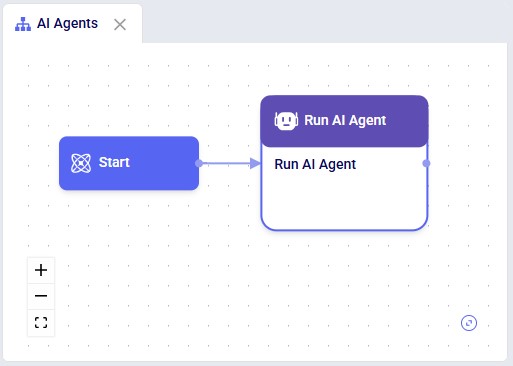
At a high level, the steps in DatsStar are as follows (screenshots follow beneath):
Your macro canvas will look similar to the following screenshot after step #4:
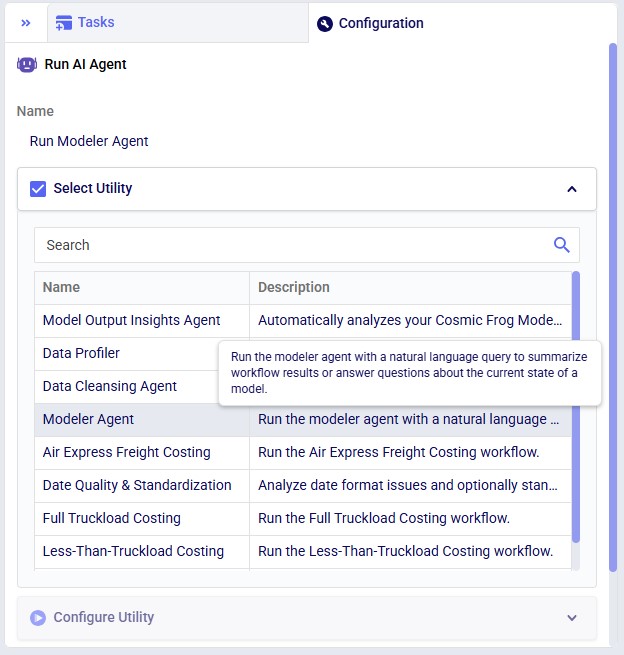
After adding a task, its configuration tab is automatically shown on the right-hand side. Give the task a name, and then select the Agent you want to use from the list of available Agents in the Select Utility section. You can also use the Search box to quickly find any Agent that contains certain text in its name or description. Hover over the description of an Agent to see the full description in case it is not entirely visible:
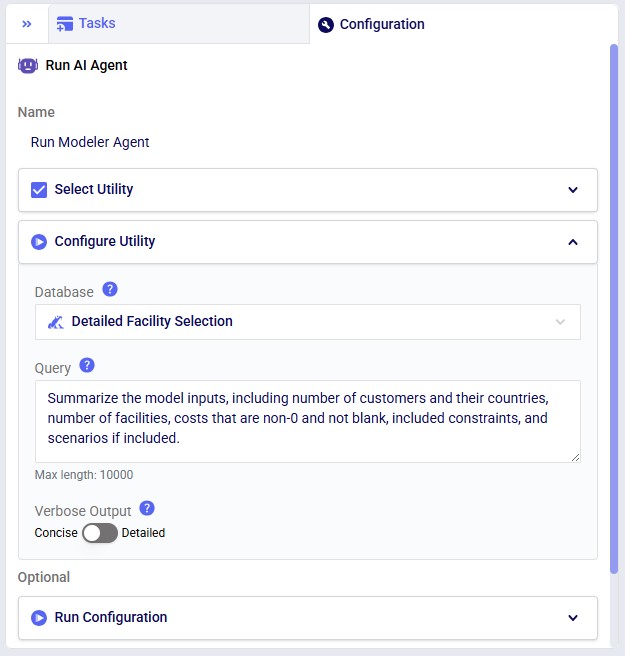
Once an Agent has been selected by clicking on it, the Configure Utility section becomes available. The inputs here will differ based on the Agent/Utility that has been selected. In the next screenshot the Configure Utility section of the Modeler Agent is shown:
Provide the inputs for at least the required parameters, and if desired for any optional ones. Note that hovering over a blue question mark icon will bring up a hover box with a description of the parameter.
Using Utilities works in the same way as using AI Agents, just through the Run Utility task instead of the Run AI Agent task. The following 3 screenshots show 1) a Run Utility task added to a Macro, 2) its Select Utility section, and 3) the Configure Utility section of the Duplicate Macro utility:
Resource Size for both Run AI Agent and Run Utility tasks can be set in the Run Configuration section, which is indicated as optional. However, for most agents and utilities, the default 3XS Resource Size is not sufficient. It is recommended to update this to XS:
The folloing AI Agents and Utilities are currently available. More are being added as they come available. For each a short description is given and for those that have more detailed documentation to go with them, a link to this documentation is included.


