

In this quick start guide we will walk-through importing a CSV file into the Project Sandbox of a DataStar project. The steps involved are:
Our example CSV file is one that contains historical shipments from May 2024 through August 2025. There are 42,656 records in this Shipments.csv file, and if you want to follow along with the steps below you can download a zip-file containing it here (please note that the long character string at the beginning of the zip's file name is expected).
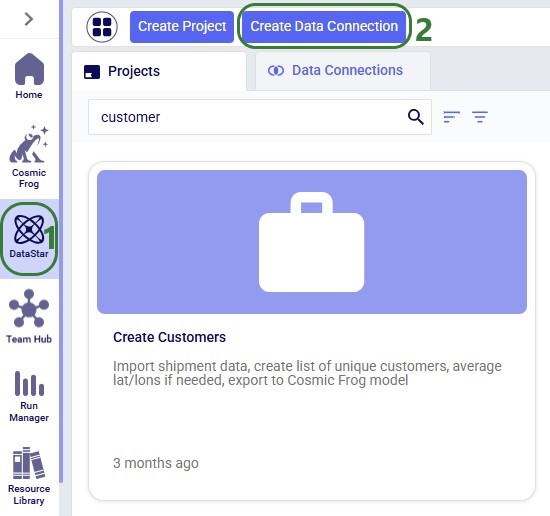
Open the DataStar application on the Optilogic platform and click on the Create Data Connection button in the toolbar at the top:
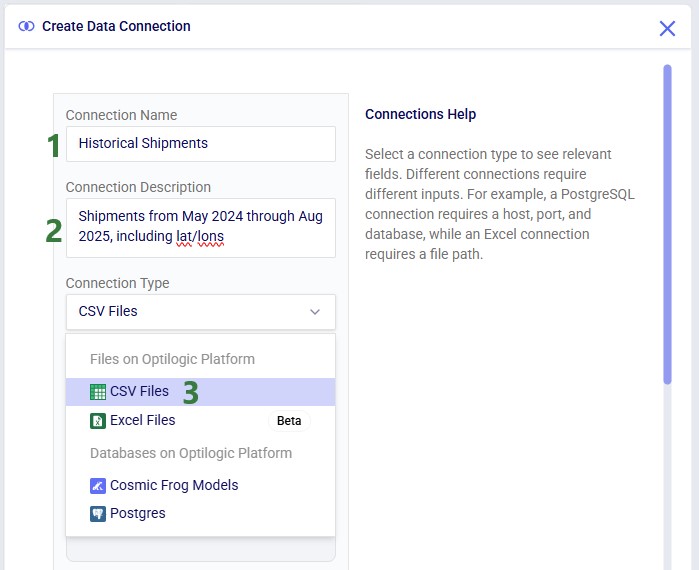
In the Create Data Connection form that comes up, enter the name for the data connection, optionally add a description, and select CSV Files from the Connection Type drop-down list:
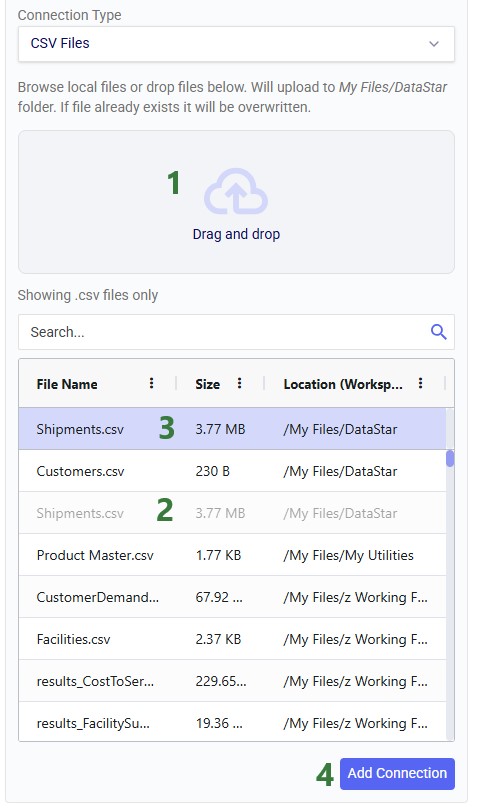
If your CSV file is not yet on the Optilogic platform, you can drag and drop it onto the “Drag and drop” area of the form to upload it to the /My Files/DataStar folder. If it is already on the Optilogic platform or after uploading it through the drag and drop option, you can select it in the list of CSV files. Once selected it becomes greyed out in the list to indicate it is the file being used; it is also pinned at the top of the list with darker background shade so users know without scrolling which file is selected. Note that you can filter this list by typing in the Search box to quickly find the desired file. Once the file is selected, users can optionally configure additional settings available on the right-hand side of the form, see the CSV File Data Connection help center article for details on these configuration options. Finally, clicking on the Add Connection button will create the CSV connection:
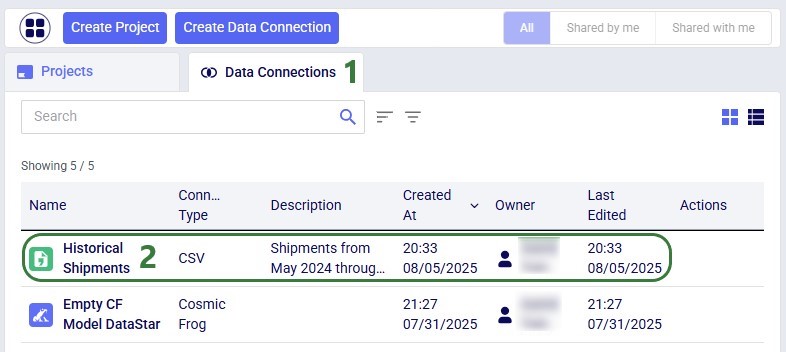
After creating the connection, the Data Connections tab on the DataStar start page will be active, and it shows the newly added CSV connection at the top of the list (note the connections list is shown in list view here; the other option is card view):
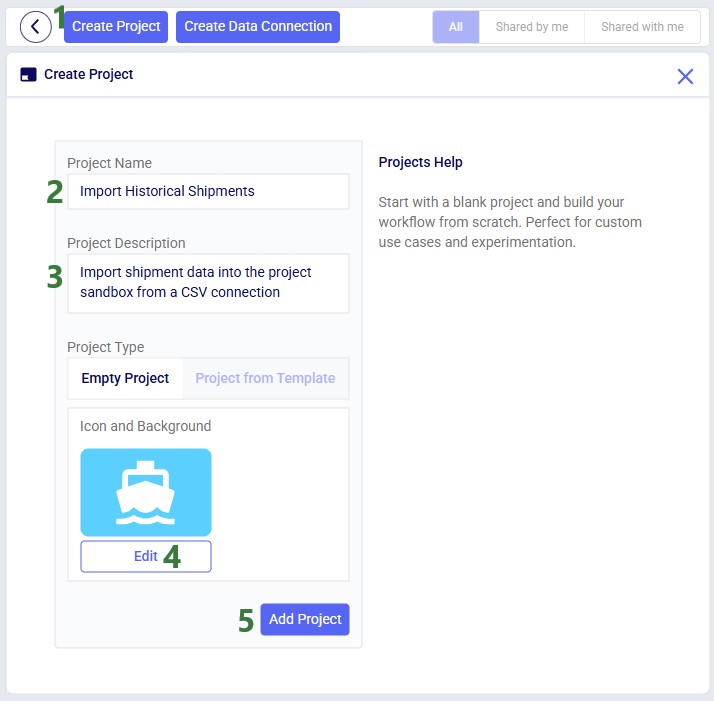
You can either go into an existing DataStar project or create a new one to set up a Macro that will import the data from the Historical Shipments CSV connection we just set up. For this example, we create a new project by clicking on the Create Project button in the toolbar at the top when on the start page of DataStar. Enter the name for the project, optionally add a description, change the appearance of the project if desired by clicking on the Edit button, and then click on the Add Project button:
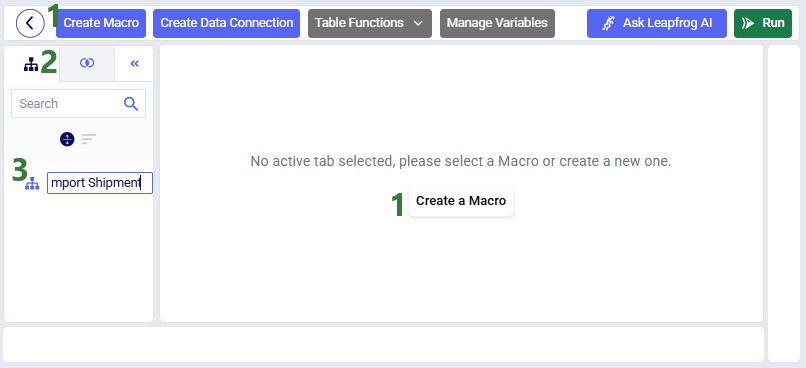
After the project is created, the Projects tab will be shown on the DataStar start page. Click on the newly created project to open it in DataStar. Inside DataStar, you can either click on the Create Macro button in the toolbar at the top or the Create a Macro button in the center part of the application (the Macro Canvas) to create a new macro which will then be listed in the Macros tab in the left-hand side panel. Type the name for the macro into the textbox:
When a macro is created, it automatically gets a Start task added to it. Next, we open the Tasks tab by clicking on tab on the left in the panel on the right-hand side of the macro canvas. Click on Import and drag it onto the macro canvas:

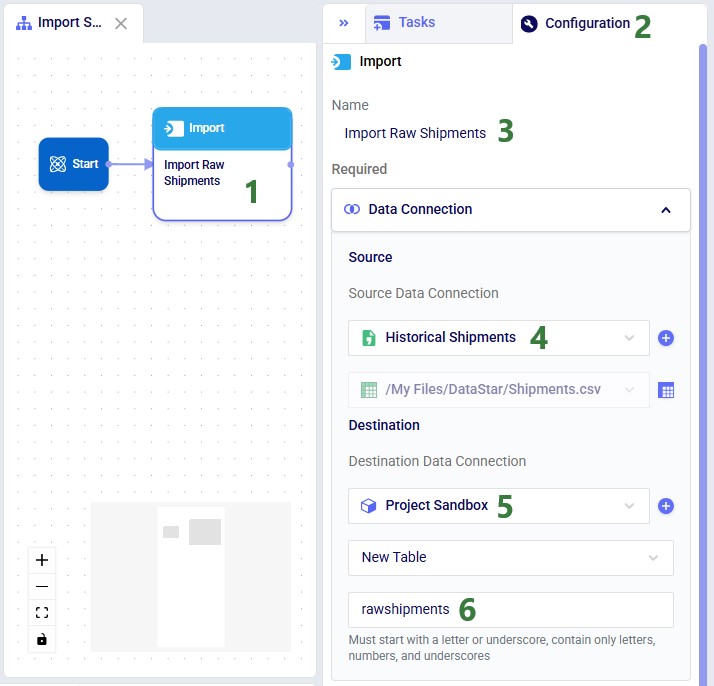
When hovering close to the Start task, it will be suggested to connect the new Import task to the Start task. Dropping the Import task here will create the connecting line between the 2 tasks automatically. Once the Import task is placed on the macro canvas, the Configuration tab in the right-hand side panel will be opened. Here users can enter the name for the task, select the data connection that is the source for the import (the Historical Shipments CSV connection), and the data connection that is the destination of the import (a new table named “rawshipments” in the Project Sandbox):
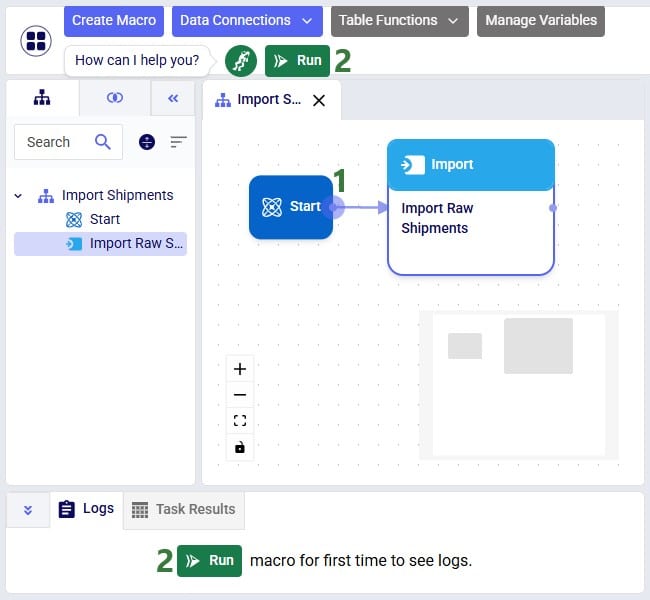
If not yet connected automatically in the previous step, connect the Import Raw Shipments task to the Start task by clicking on the connection point in the middle of the right edge of the Start task, holding the mouse down and dragging the connection line to the connection point in the middle of the left edge of the Import Raw Shipments task. Next, we can test the macro that has been set up so far by running it: either click on the green Run button in the toolbar at the top of DataStar or click on the Run button in the Logs tab at the bottom of the macro canvas:
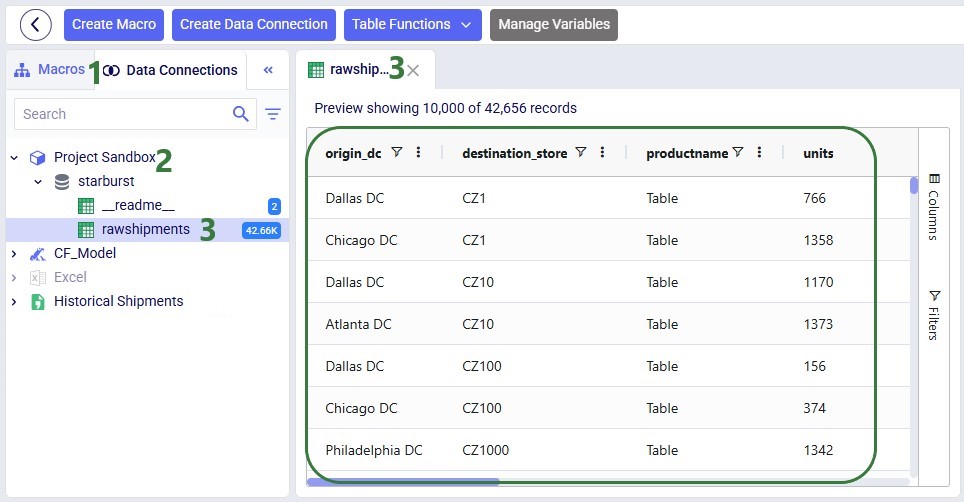
You can follow the progress of the Macro run in the Logs tab and once finished examine the results on the Data Connections tab. Expand the Project Sandbox data connection to open the rawshipments table by clicking on it. A preview of the table of up to 10,000 records will be displayed in the central part of DataStar:

In this quick start guide we will walk-through importing a CSV file into the Project Sandbox of a DataStar project. The steps involved are:
Our example CSV file is one that contains historical shipments from May 2024 through August 2025. There are 42,656 records in this Shipments.csv file, and if you want to follow along with the steps below you can download a zip-file containing it here (please note that the long character string at the beginning of the zip's file name is expected).
Open the DataStar application on the Optilogic platform and click on the Create Data Connection button in the toolbar at the top:
In the Create Data Connection form that comes up, enter the name for the data connection, optionally add a description, and select CSV Files from the Connection Type drop-down list:
If your CSV file is not yet on the Optilogic platform, you can drag and drop it onto the “Drag and drop” area of the form to upload it to the /My Files/DataStar folder. If it is already on the Optilogic platform or after uploading it through the drag and drop option, you can select it in the list of CSV files. Once selected it becomes greyed out in the list to indicate it is the file being used; it is also pinned at the top of the list with darker background shade so users know without scrolling which file is selected. Note that you can filter this list by typing in the Search box to quickly find the desired file. Once the file is selected, users can optionally configure additional settings available on the right-hand side of the form, see the CSV File Data Connection help center article for details on these configuration options. Finally, clicking on the Add Connection button will create the CSV connection:
After creating the connection, the Data Connections tab on the DataStar start page will be active, and it shows the newly added CSV connection at the top of the list (note the connections list is shown in list view here; the other option is card view):
You can either go into an existing DataStar project or create a new one to set up a Macro that will import the data from the Historical Shipments CSV connection we just set up. For this example, we create a new project by clicking on the Create Project button in the toolbar at the top when on the start page of DataStar. Enter the name for the project, optionally add a description, change the appearance of the project if desired by clicking on the Edit button, and then click on the Add Project button:
After the project is created, the Projects tab will be shown on the DataStar start page. Click on the newly created project to open it in DataStar. Inside DataStar, you can either click on the Create Macro button in the toolbar at the top or the Create a Macro button in the center part of the application (the Macro Canvas) to create a new macro which will then be listed in the Macros tab in the left-hand side panel. Type the name for the macro into the textbox:
When a macro is created, it automatically gets a Start task added to it. Next, we open the Tasks tab by clicking on tab on the left in the panel on the right-hand side of the macro canvas. Click on Import and drag it onto the macro canvas:
When hovering close to the Start task, it will be suggested to connect the new Import task to the Start task. Dropping the Import task here will create the connecting line between the 2 tasks automatically. Once the Import task is placed on the macro canvas, the Configuration tab in the right-hand side panel will be opened. Here users can enter the name for the task, select the data connection that is the source for the import (the Historical Shipments CSV connection), and the data connection that is the destination of the import (a new table named “rawshipments” in the Project Sandbox):
If not yet connected automatically in the previous step, connect the Import Raw Shipments task to the Start task by clicking on the connection point in the middle of the right edge of the Start task, holding the mouse down and dragging the connection line to the connection point in the middle of the left edge of the Import Raw Shipments task. Next, we can test the macro that has been set up so far by running it: either click on the green Run button in the toolbar at the top of DataStar or click on the Run button in the Logs tab at the bottom of the macro canvas:
You can follow the progress of the Macro run in the Logs tab and once finished examine the results on the Data Connections tab. Expand the Project Sandbox data connection to open the rawshipments table by clicking on it. A preview of the table of up to 10,000 records will be displayed in the central part of DataStar:


