

Cosmic Frog users can now visualize routes from Hopper (transportation optimization) and Neo (network optimization) on real road networks instead of straight lines. Valhalla, an open-source routing engine for OpenStreetMap, is used to calculate the waypoints.
This guide assumes familiarity with how to configure maps and their layers in Cosmic Frog. See the Getting Started with Maps help center article for the basics.
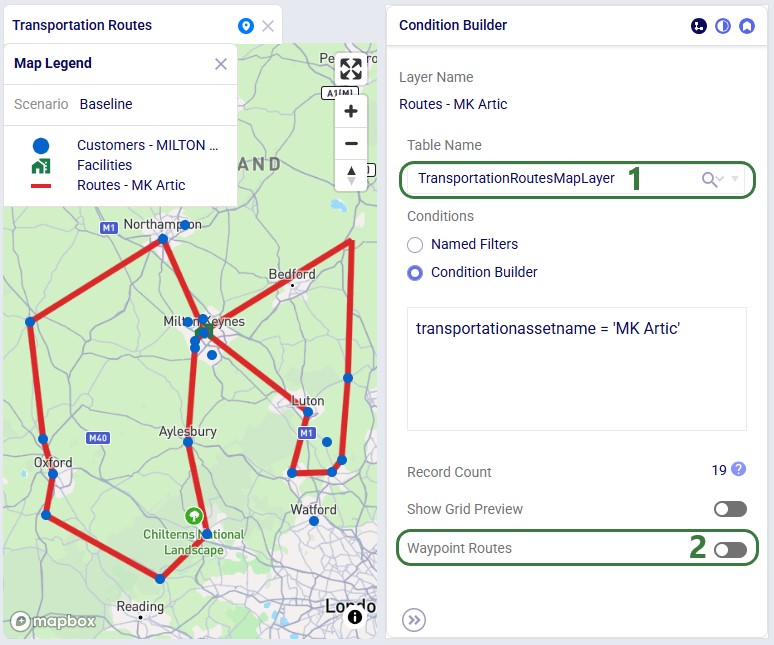
There are 2 tables available in the Table Name drop-down on the Condition Builder panel of a map layer for which waypoint routes can be generated:
In both cases the configuration is similar; first we will cover a Hopper example and then a Neo example.
Please note:
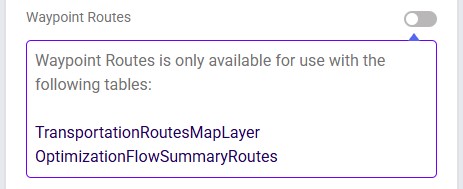

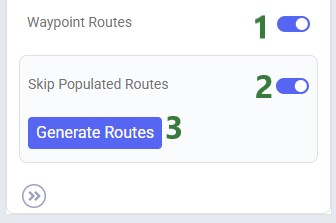
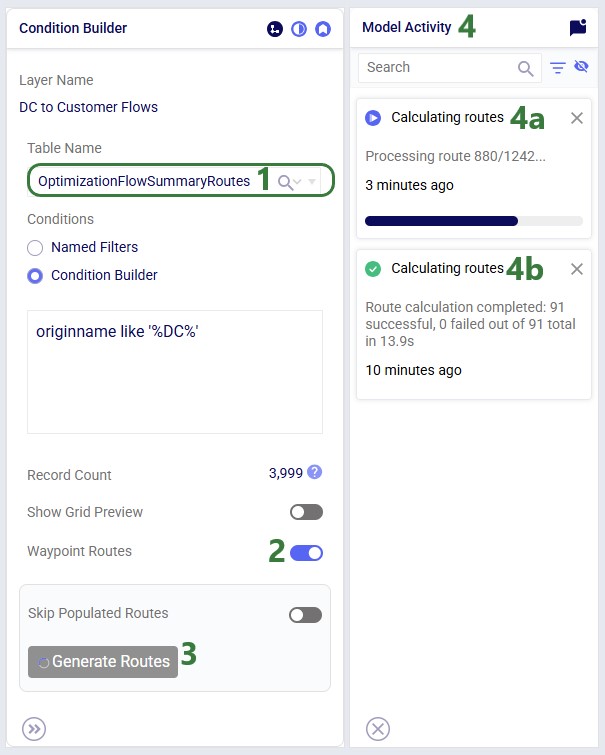
In our example case neither warning comes up, and the user turns on the Waypoint Routes option:
Processing time depends on the number of origin-destination pairs. As an indication, a larger Hopper model with ~3,000 routes took a little under 4 minutes to generate all waypoints.
Users can monitor the progress of the waypoint routes generation by opening the Model Activity panel:

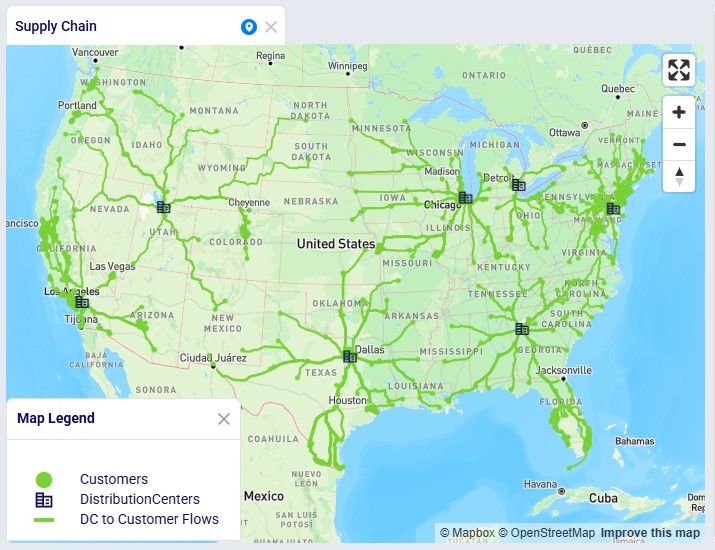
Once the calculation completes, the map is updated to show the routes the waypoints have been calculated for on the road network:

In this Neo example, we will generate road network flows for the following DC to Customer flows. This represents 1,333 unique origin-destination pairs:
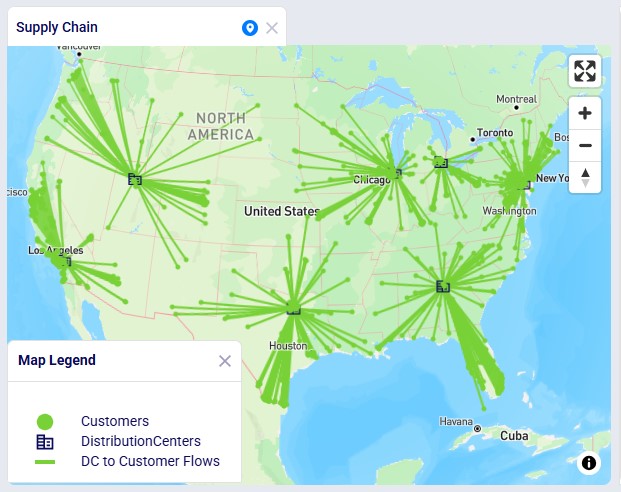
Once the waypoints have been calculated, the map updates and now looks as follows:

Cosmic Frog users can now visualize routes from Hopper (transportation optimization) and Neo (network optimization) on real road networks instead of straight lines. Valhalla, an open-source routing engine for OpenStreetMap, is used to calculate the waypoints.
This guide assumes familiarity with how to configure maps and their layers in Cosmic Frog. See the Getting Started with Maps help center article for the basics.
There are 2 tables available in the Table Name drop-down on the Condition Builder panel of a map layer for which waypoint routes can be generated:
In both cases the configuration is similar; first we will cover a Hopper example and then a Neo example.
Please note:
In our example case neither warning comes up, and the user turns on the Waypoint Routes option:
Processing time depends on the number of origin-destination pairs. As an indication, a larger Hopper model with ~3,000 routes took a little under 4 minutes to generate all waypoints.
Users can monitor the progress of the waypoint routes generation by opening the Model Activity panel:
Once the calculation completes, the map is updated to show the routes the waypoints have been calculated for on the road network:
In this Neo example, we will generate road network flows for the following DC to Customer flows. This represents 1,333 unique origin-destination pairs:
Once the waypoints have been calculated, the map updates and now looks as follows:


