

Users of the Optilogic platform can easily access all files they have in their Optilogic account and perform common tasks like opening, copying, and sharing them by using the built-in Explorer application. This application sits across all other applications on the Optilogic platform.
This documentation will walk users through how to access the Explorer, explain its folder and file structure, how to quickly find files of interest, and how to perform common actions.
By default, the Explorer is closed when users are logged into the Optilogic platform, they can open it at the top of the applications list:

Once the Explorer is open, your screen will look similar to the following screenshot:

This next screenshot shows the Explorer when it is open while the user is working inside the workspace of one of the teams they are part of, and not in their My Account workspace:

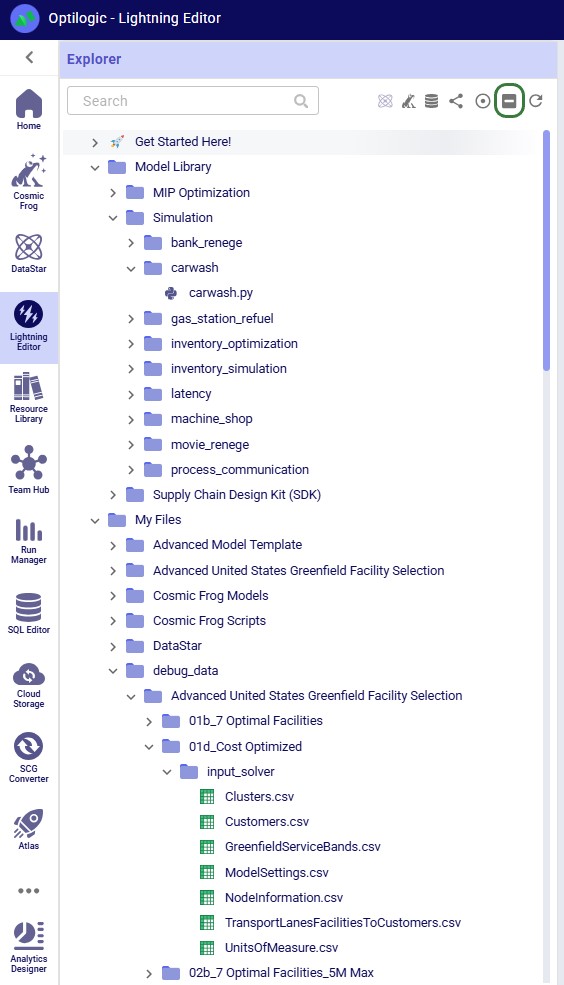
When a new user logs into their Optilogic account and opens the Explorer, they will find there are quite a few folders and files present in their account already. The next screenshot shows the expanded top-level folders:

As you may have noticed already, different file types can be recognized by the different icons to the left of the file’s name. The following table summarizes some of the common file types users may have in their accounts, shows the icon used for these in the Explorer, and indicates which application the file will be opened in when (left-)clicking on the file:

*When clicking on files of these types, the Lightning Editor application will be opened and a message stating that the file is potentially unsupported will be displayed. Users can click on a “Load Anyway” button to attempt to load the file in the Lightning Editor. If the user chooses to do so, the file will be loaded, but the result will usually be unintelligible for these file types.
Some file types can be opened in other applications on the Optilogic platform too. These options are available from the right-click context menus, see the “Right-click Context Menus” section further below.
Icons to the right of names of Cosmic Frog models in the Explorer indicate if the model is a shared one and if so, what type of access the user / team has to it. Hovering over these icons will show text describing the type of share too.
Learn more about sharing models and the details of read-write vs read-only access in the “Model Sharing & Backups for Multi-user Collaboration in Cosmic Frog” help center article.
While working on the Optilogic platform, additional files and folders can be created in / added to a user’s account. In this section we will discuss which applications create what types of files and where in the folder structure they can be found in the Explorer.
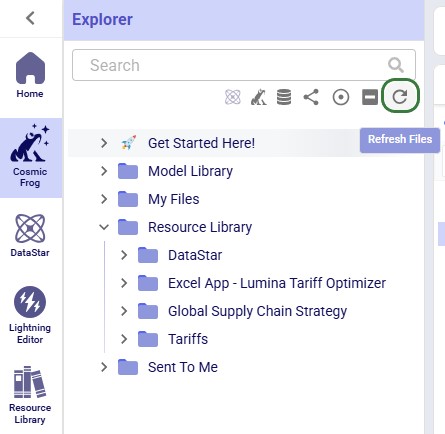
The Resource Library on the Optilogic platform contains example Cosmic Frog models, DataStar template projects, Cosmic Frog for Excel Apps, Python scripts, reference data, utilities, and additional tools to help make Optilogic platform users successful. Users can browse the Resource Library and copy content from there to their own account to explore further (see the “How to use the Resource Library” help center article for more details):

Please note that Cosmic Frog models copied from the Resource Library are placed into a subfolder with the model’s name under the Resource Library folder; they can be recognized in the Explorer by their frog icon to the left of the model’s name and the .frog extension.
In addition, please note that previously, files copied from the Resource Library were placed in a different location in users’ accounts and not in the Resource Library folder and its subfolders. The old location was a subfolder with the resource’s name under the My Files folder. Users who have been using the Optilogic platform for a while will likely still see this file structure for files copied from the Resource Library before this change was made.
Users can create new Cosmic Frog models from Cosmic Frog’s start page (see this help center article); these will be placed in a subfolder named “Cosmic Frog Models”, which sits under the My Files folder:
Users can create new DataStar projects from DataStar's start page (see this help center article); these will be placed in a subfolder named “DataStar”, which sits under the My Files folder. Within this DataStar folder, sub-folders with the names of the DataStar projects are created and the .dstar project files are located in these folders. In the following screenshot, we are showing 2 DataStar projects, 1 named "Cost to Serve Analysis" and 1 named "Create Customers":

DataStar users may upload files to use with their data connections through the DataStar application (see this help center article). These uploaded files are also placed in the /My Files/DataStar folder:
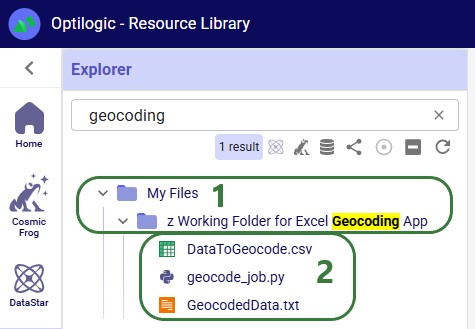
When working with any of the Cosmic Frog for Excel Apps (see also this help center article), the working files for these will be placed in subfolders under the My Files folder. These are named “z Working Folder for … App”:
In addition to the above-mentioned subfolders (Resource Library, Cosmic Frog Models, DataStar, and “z Working Folder for … App” folders) which are often present under the My Files top-level folder in a user’s Optilogic account, there are several other folders worth covering here:
Now that we have covered the folder and file structure of the Explorer including the default and common files and folders users may find here, it is time to cover how users can quickly find what they need using the options towards the top of the Explorer application.
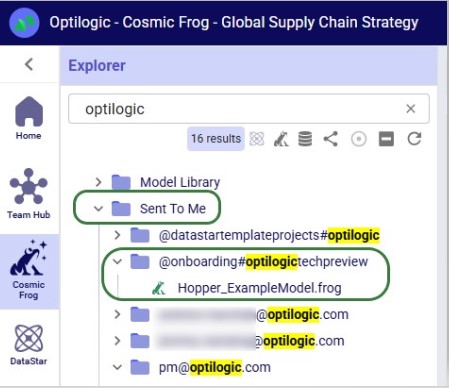
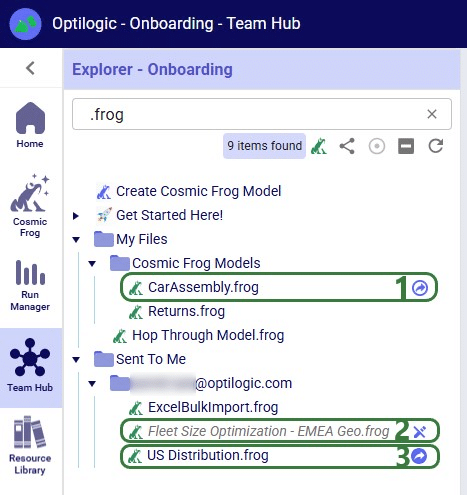
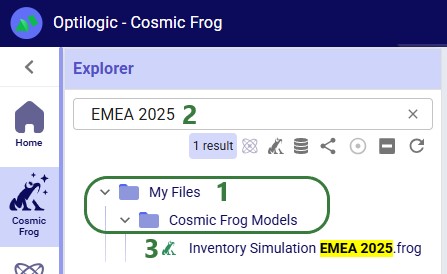
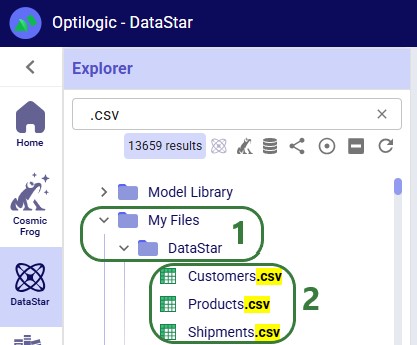
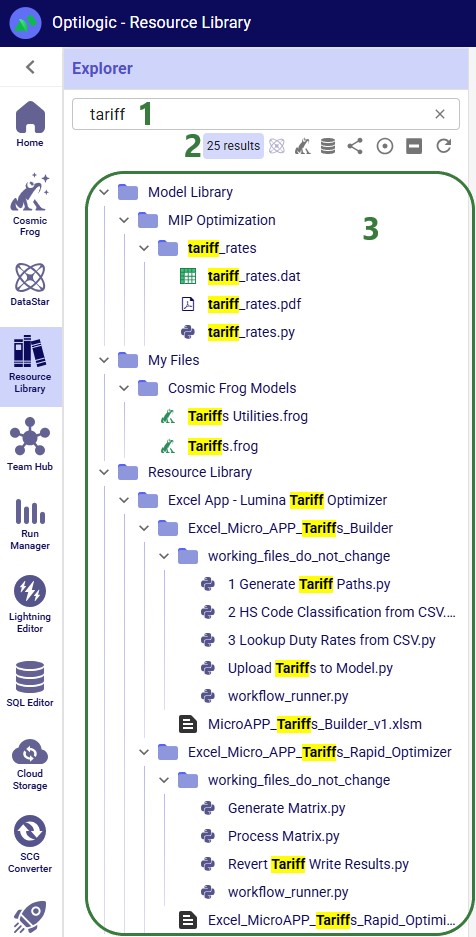
There is a free type text search box at the top of the Explorer application, which users can use to quickly find files and folders that contain the typed text in their names:
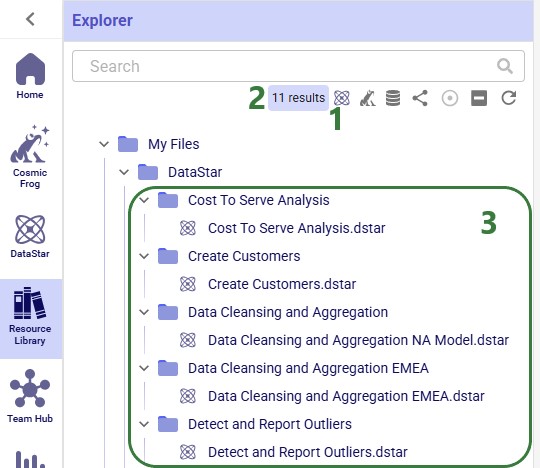
There is a quick search option to find all DataStar projects in the user’s account:
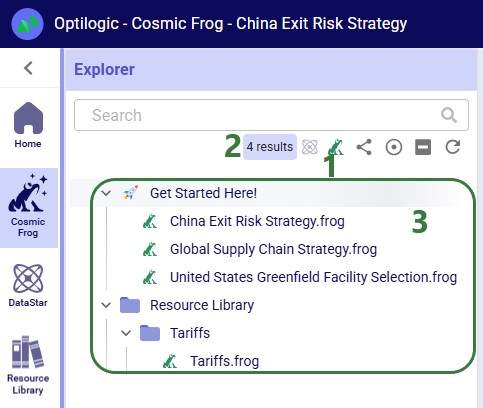
Similarly, there is a quick search option to find all Cosmic Frog models in the user’s account:
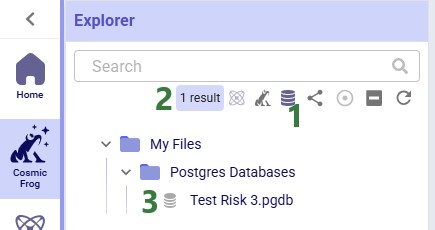
There is also a quick filter function to find all PostgreSQL databases in a user's account:
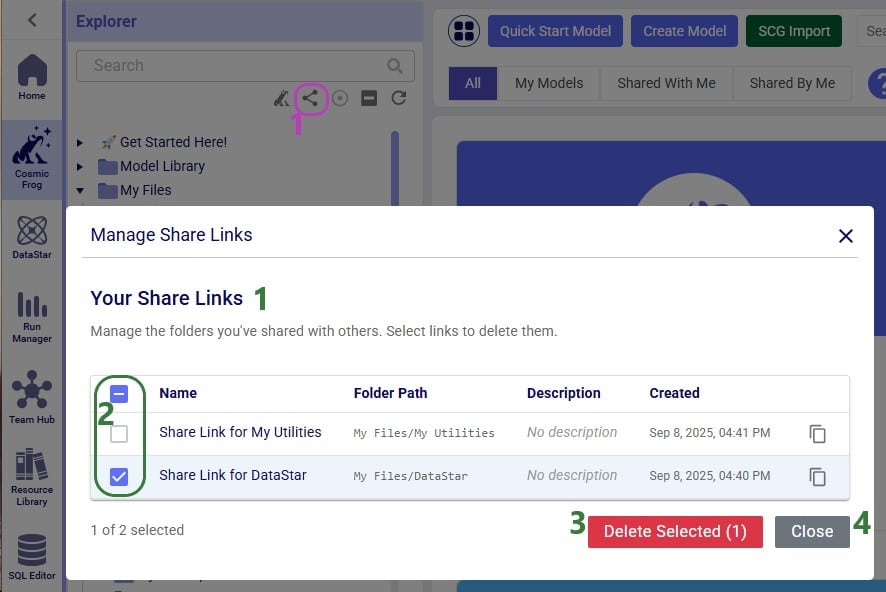
Users can create share links for folders in their Optilogic account to send a copy of the folder and all its contents to other users. See this “Folder Sharing” section in the “Model Sharing & Backups for Multi-User Collaboration in Cosmic Frog” help center article on how to create and use share links. If a user has created any share links for folders in their account, these can be managed by clicking on the View Share Links icon:
When browsing through the files and folders in your Optilogic account, you may collapse and expand quite a few different folders and their subfolders. Users can at times lose track of where the file they had selected is located. To help with this, users have the “Expand to Selected File” option available to them:
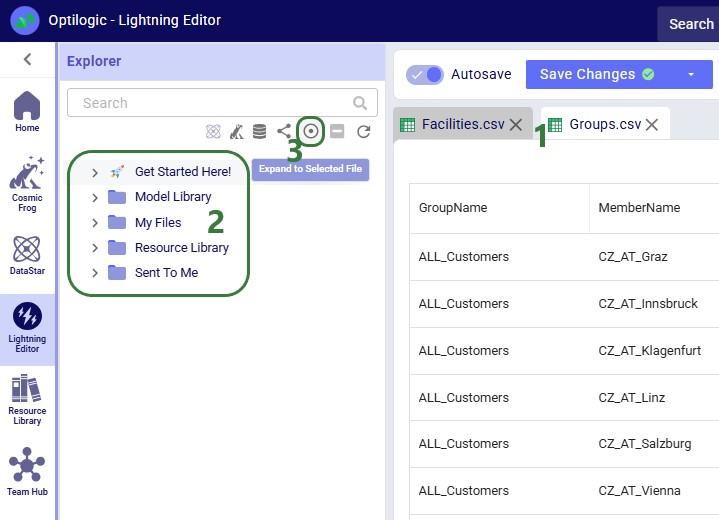
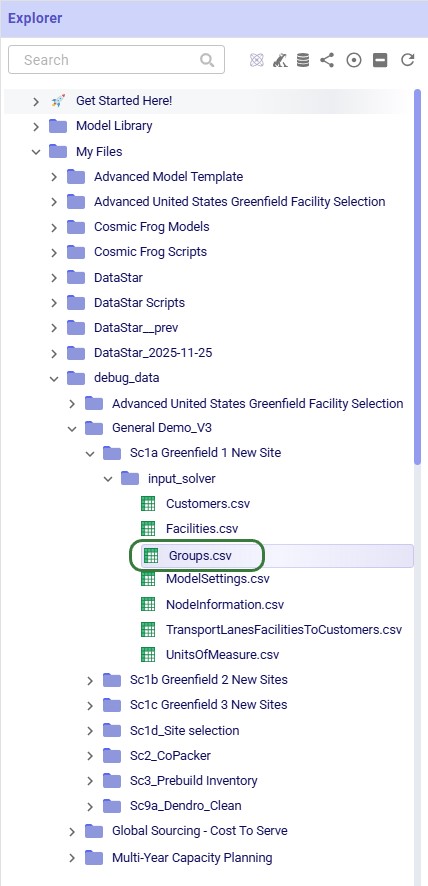
In addition to using the Expand to Selected File option, please note that switching to another file in the Lightning Editor by for example clicking on the Facilities.csv file, will further expand the Explorer to show that file in the list too. If needed, the Explorer will also automatically scroll up or down to show the active file in the center of the list.
If you have many folders and subfolders expanded, it can be tedious to collapse them all one by one again. Therefore, users also have a “Collapse All” option at their disposal when working with the Explorer. The following screenshot shows the state of the Explorer before clicking on the Collapse All icon, which is the 6th of the 7 icons to the right of the Search box in the following screenshot:
The user then clicks on the Collapse All icon and the following screenshot shows the state of the Explorer after doing so:

Note that the Collapse All icon has now become inactive and will remain so until any folders are expanded again.
Sometimes when deleting, copying, or adding files or folders to a user’s account, these changes may not be immediately reflected in the Explorer files & folders list as they may take a bit of time. The last of the icons to the right of / underneath the Search box provides users with a “Refresh Files” option. Clicking on this icon will update the files and folders list such that all the latest are showing in the Explorer:
In this final section of the Explorer documentation, we will cover the options users have from the context menus that come up when right-clicking on files and folders in the Explorer. Screenshots and text will explain the options in the context menus for folders, Cosmic Frog models, text-based files, and all other files.
When right-clicking on a folder in the Explorer, users will see the following context menu come up (here the user right-clicked on the Model Library folder):
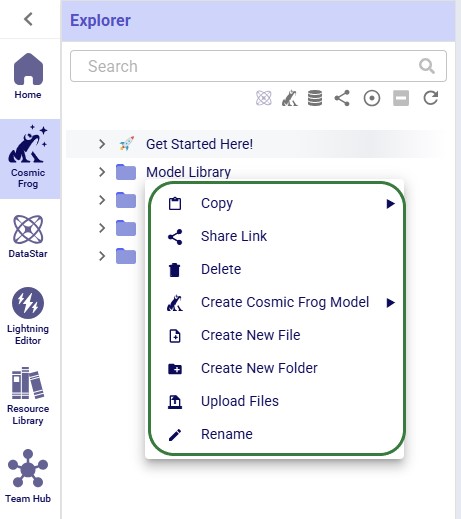
The options from this context menu are, from top to bottom:
Note that right-clicking on the Get Started Here folder gives fewer options: just the Copy (with the same 3 options as above), Share Link, and Delete Folder options are available for this folder.
Now, we will cover the options available from the context menu when right-clicking on different types of files, starting with Cosmic Frog models:

The options, from top to bottom, are:
Please note that the Cosmic Frog models listed in the Explorer are not actual databases, but pointer files. These are essentially empty placeholder files to let users visualize and interact with models inside the Explorer. Due to this, actions like downloading are not possible; working directly with the Cosmic Frog model databases can be done through Cosmic Frog or the SQL Editor.
Next, we will look at the right-click context menu for DataStar projects. The options here are very similar to those of Cosmic Frog models:
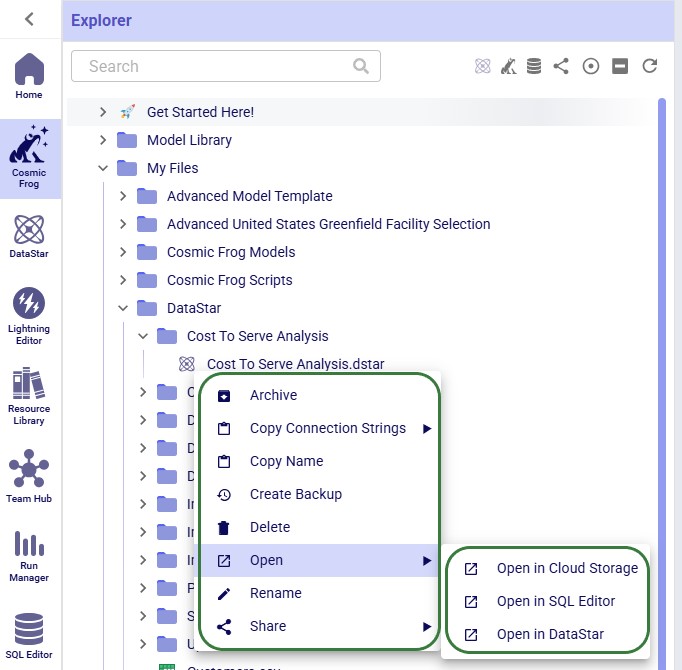
The options, from top to bottom, are:
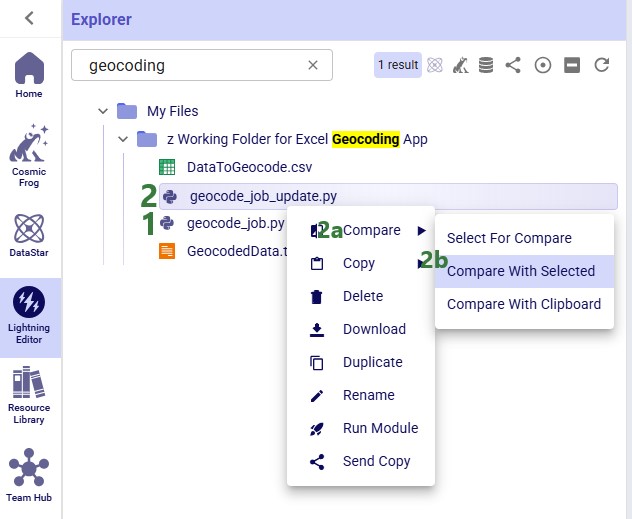
When right-clicking on a Python script file, the following context menu will open:
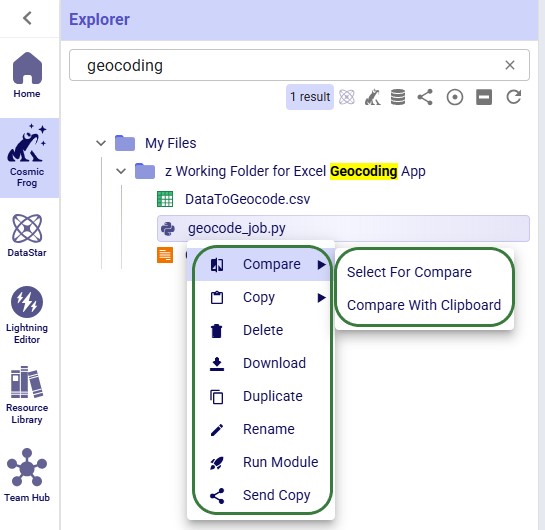
The options, from top to bottom, are:
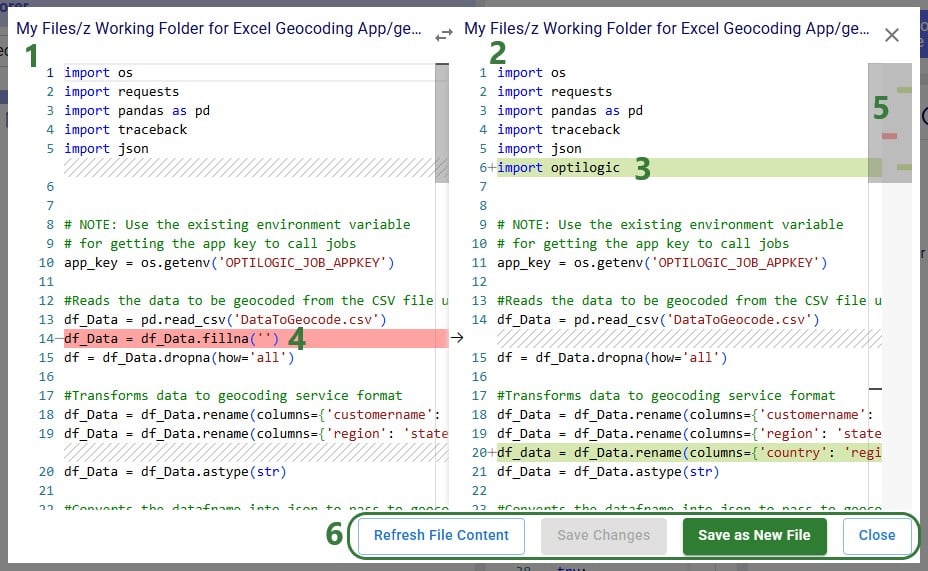
The next 2 screenshots show what it looks like when comparing 2 text-based files with each other:
Other text-based files, such as those with extensions of .csv, .txt, .md and .html have the same options in their context menus as those for Python script files, with the exception that they do not have a Run Module option. The next screenshot shows the context menu that comes up when right-clicking on a .txt file:

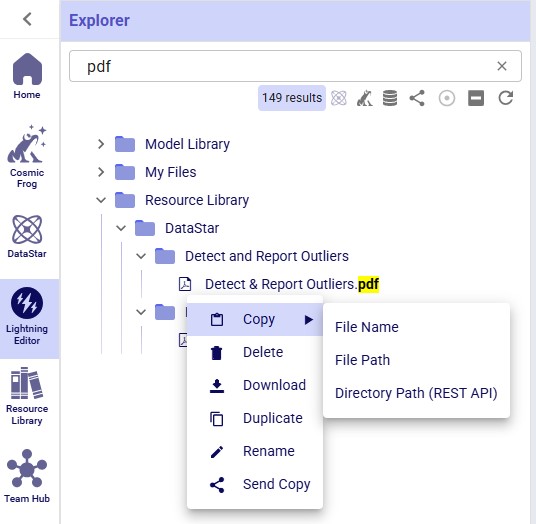
Other files, such as those with extensions of .pdf, .xls, .xlsx, .xlsm, .png, .jpg, .twb and .yxmd, have the same options from their context menus as Python scripts, minus the Compare and Run Module options. The following screenshot shows the context menu of a .pdf file:
As always, please feel free to let us know of any questions or feedback by contacting Optilogic support on support@optilogic.com.

Users of the Optilogic platform can easily access all files they have in their Optilogic account and perform common tasks like opening, copying, and sharing them by using the built-in Explorer application. This application sits across all other applications on the Optilogic platform.
This documentation will walk users through how to access the Explorer, explain its folder and file structure, how to quickly find files of interest, and how to perform common actions.
By default, the Explorer is closed when users are logged into the Optilogic platform, they can open it at the top of the applications list:
Once the Explorer is open, your screen will look similar to the following screenshot:
This next screenshot shows the Explorer when it is open while the user is working inside the workspace of one of the teams they are part of, and not in their My Account workspace:
When a new user logs into their Optilogic account and opens the Explorer, they will find there are quite a few folders and files present in their account already. The next screenshot shows the expanded top-level folders:
As you may have noticed already, different file types can be recognized by the different icons to the left of the file’s name. The following table summarizes some of the common file types users may have in their accounts, shows the icon used for these in the Explorer, and indicates which application the file will be opened in when (left-)clicking on the file:
*When clicking on files of these types, the Lightning Editor application will be opened and a message stating that the file is potentially unsupported will be displayed. Users can click on a “Load Anyway” button to attempt to load the file in the Lightning Editor. If the user chooses to do so, the file will be loaded, but the result will usually be unintelligible for these file types.
Some file types can be opened in other applications on the Optilogic platform too. These options are available from the right-click context menus, see the “Right-click Context Menus” section further below.
Icons to the right of names of Cosmic Frog models in the Explorer indicate if the model is a shared one and if so, what type of access the user / team has to it. Hovering over these icons will show text describing the type of share too.
Learn more about sharing models and the details of read-write vs read-only access in the “Model Sharing & Backups for Multi-user Collaboration in Cosmic Frog” help center article.
While working on the Optilogic platform, additional files and folders can be created in / added to a user’s account. In this section we will discuss which applications create what types of files and where in the folder structure they can be found in the Explorer.
The Resource Library on the Optilogic platform contains example Cosmic Frog models, DataStar template projects, Cosmic Frog for Excel Apps, Python scripts, reference data, utilities, and additional tools to help make Optilogic platform users successful. Users can browse the Resource Library and copy content from there to their own account to explore further (see the “How to use the Resource Library” help center article for more details):
Please note that Cosmic Frog models copied from the Resource Library are placed into a subfolder with the model’s name under the Resource Library folder; they can be recognized in the Explorer by their frog icon to the left of the model’s name and the .frog extension.
In addition, please note that previously, files copied from the Resource Library were placed in a different location in users’ accounts and not in the Resource Library folder and its subfolders. The old location was a subfolder with the resource’s name under the My Files folder. Users who have been using the Optilogic platform for a while will likely still see this file structure for files copied from the Resource Library before this change was made.
Users can create new Cosmic Frog models from Cosmic Frog’s start page (see this help center article); these will be placed in a subfolder named “Cosmic Frog Models”, which sits under the My Files folder:
Users can create new DataStar projects from DataStar's start page (see this help center article); these will be placed in a subfolder named “DataStar”, which sits under the My Files folder. Within this DataStar folder, sub-folders with the names of the DataStar projects are created and the .dstar project files are located in these folders. In the following screenshot, we are showing 2 DataStar projects, 1 named "Cost to Serve Analysis" and 1 named "Create Customers":
DataStar users may upload files to use with their data connections through the DataStar application (see this help center article). These uploaded files are also placed in the /My Files/DataStar folder:
When working with any of the Cosmic Frog for Excel Apps (see also this help center article), the working files for these will be placed in subfolders under the My Files folder. These are named “z Working Folder for … App”:
In addition to the above-mentioned subfolders (Resource Library, Cosmic Frog Models, DataStar, and “z Working Folder for … App” folders) which are often present under the My Files top-level folder in a user’s Optilogic account, there are several other folders worth covering here:
Now that we have covered the folder and file structure of the Explorer including the default and common files and folders users may find here, it is time to cover how users can quickly find what they need using the options towards the top of the Explorer application.
There is a free type text search box at the top of the Explorer application, which users can use to quickly find files and folders that contain the typed text in their names:
There is a quick search option to find all DataStar projects in the user’s account:
Similarly, there is a quick search option to find all Cosmic Frog models in the user’s account:
There is also a quick filter function to find all PostgreSQL databases in a user's account:
Users can create share links for folders in their Optilogic account to send a copy of the folder and all its contents to other users. See this “Folder Sharing” section in the “Model Sharing & Backups for Multi-User Collaboration in Cosmic Frog” help center article on how to create and use share links. If a user has created any share links for folders in their account, these can be managed by clicking on the View Share Links icon:
When browsing through the files and folders in your Optilogic account, you may collapse and expand quite a few different folders and their subfolders. Users can at times lose track of where the file they had selected is located. To help with this, users have the “Expand to Selected File” option available to them:
In addition to using the Expand to Selected File option, please note that switching to another file in the Lightning Editor by for example clicking on the Facilities.csv file, will further expand the Explorer to show that file in the list too. If needed, the Explorer will also automatically scroll up or down to show the active file in the center of the list.
If you have many folders and subfolders expanded, it can be tedious to collapse them all one by one again. Therefore, users also have a “Collapse All” option at their disposal when working with the Explorer. The following screenshot shows the state of the Explorer before clicking on the Collapse All icon, which is the 6th of the 7 icons to the right of the Search box in the following screenshot:
The user then clicks on the Collapse All icon and the following screenshot shows the state of the Explorer after doing so:
Note that the Collapse All icon has now become inactive and will remain so until any folders are expanded again.
Sometimes when deleting, copying, or adding files or folders to a user’s account, these changes may not be immediately reflected in the Explorer files & folders list as they may take a bit of time. The last of the icons to the right of / underneath the Search box provides users with a “Refresh Files” option. Clicking on this icon will update the files and folders list such that all the latest are showing in the Explorer:
In this final section of the Explorer documentation, we will cover the options users have from the context menus that come up when right-clicking on files and folders in the Explorer. Screenshots and text will explain the options in the context menus for folders, Cosmic Frog models, text-based files, and all other files.
When right-clicking on a folder in the Explorer, users will see the following context menu come up (here the user right-clicked on the Model Library folder):
The options from this context menu are, from top to bottom:
Note that right-clicking on the Get Started Here folder gives fewer options: just the Copy (with the same 3 options as above), Share Link, and Delete Folder options are available for this folder.
Now, we will cover the options available from the context menu when right-clicking on different types of files, starting with Cosmic Frog models:
The options, from top to bottom, are:
Please note that the Cosmic Frog models listed in the Explorer are not actual databases, but pointer files. These are essentially empty placeholder files to let users visualize and interact with models inside the Explorer. Due to this, actions like downloading are not possible; working directly with the Cosmic Frog model databases can be done through Cosmic Frog or the SQL Editor.
Next, we will look at the right-click context menu for DataStar projects. The options here are very similar to those of Cosmic Frog models:
The options, from top to bottom, are:
When right-clicking on a Python script file, the following context menu will open:
The options, from top to bottom, are:
The next 2 screenshots show what it looks like when comparing 2 text-based files with each other:
Other text-based files, such as those with extensions of .csv, .txt, .md and .html have the same options in their context menus as those for Python script files, with the exception that they do not have a Run Module option. The next screenshot shows the context menu that comes up when right-clicking on a .txt file:
Other files, such as those with extensions of .pdf, .xls, .xlsx, .xlsm, .png, .jpg, .twb and .yxmd, have the same options from their context menus as Python scripts, minus the Compare and Run Module options. The following screenshot shows the context menu of a .pdf file:
As always, please feel free to let us know of any questions or feedback by contacting Optilogic support on support@optilogic.com.


