

The Auto-Archiving feature helps keep your account clean and efficient while ensuring Optilogic maintains a streamlined, cost-effective storage footprint. By automatically archiving inactive databases, we reduce unnecessary server load, improve overall performance, and free up space so you can always create new Cosmic Frog models or DataStar projects when you need them.
From your perspective, Auto-Archiving means less manual cleanup and more confidence that your account is organized, fast, and ready for your next project.
Archiving moves a database from an active state into long-term storage. Once archived:
Important: Auto-archiving does not delete your data. You are always in control and can restore an archived database back into an active state.
With Auto-Archiving, you do not need to manually track and archive inactive databases. Our system will automatically archive any database that has been inactive for 90 days.
The screenshot below shows the notifications you will receive when 1) there are databases in your account that meet the criteria for an auto-archive event and 2) once databases have been archived:
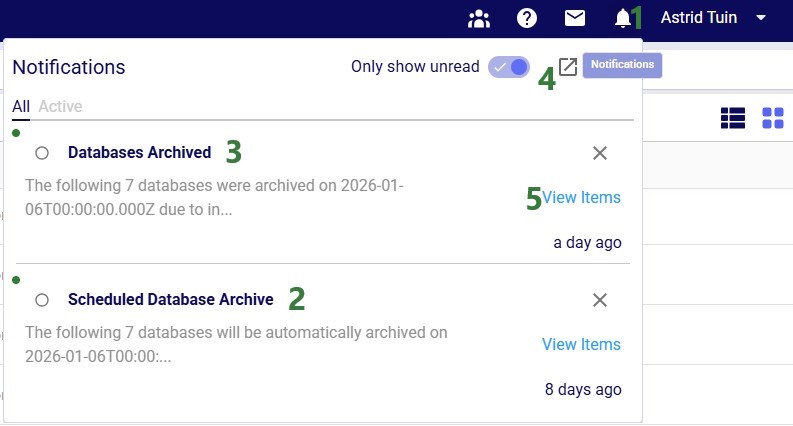
Now, we will take a look at the Notifications Page, which is opened using the pop-out icon in the in-app notification, described under bullet #4 above:
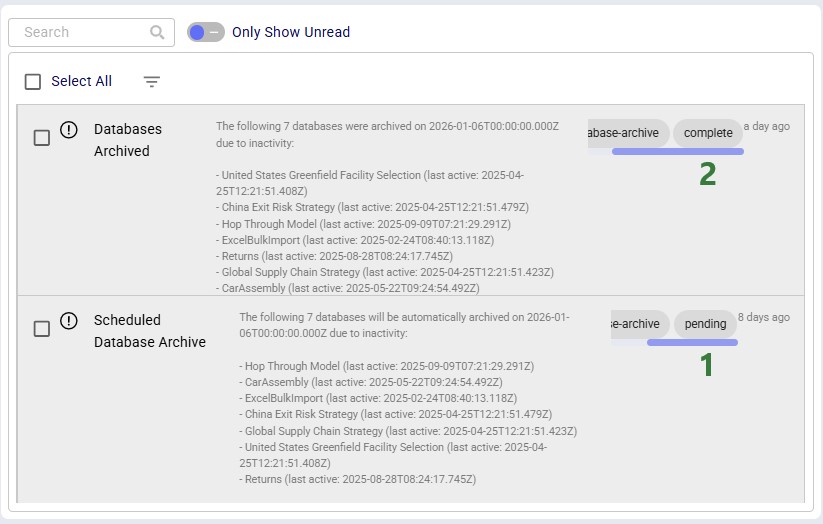
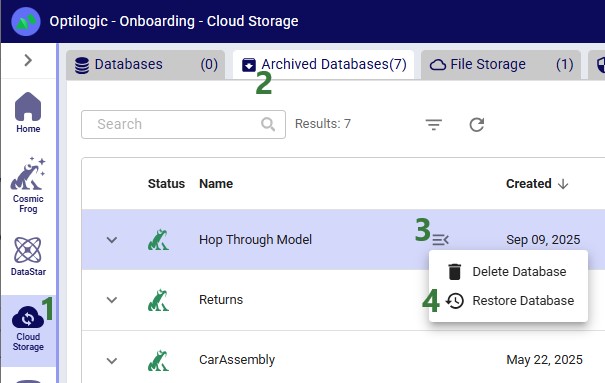
Clicking on the “View Items” link of a “Scheduled Database Archive” in-app notification (see bullet #5 of the first screenshot) will take you to a filtered view in the Cloud Storage application where you can see all the databases that will be auto-archived (note that this shows a different example with different databases to be archived as the previous screenshots):
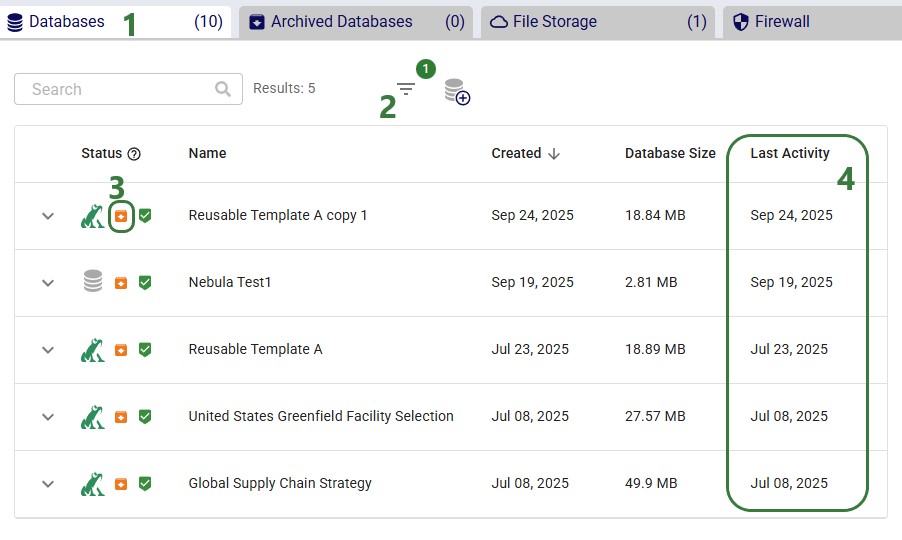
This next screenshot shows the filter that is applied on the Databases tab:
Clicking on the “View Items” link of a “Databases Archived” in-app notification (see bullet #5 of the first screenshot) will again take you to a filtered view in the Cloud Storage application where you can see the databases that have been auto-archived:

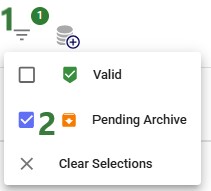
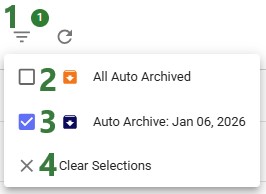
Finally, the following screenshot shows the filter that was applied on the Archived Databases tab:
Archiving is not just about organization — it also enhances performance across the platform. By reducing the number of idle databases consuming system resources, we lower the likelihood of “noisy neighbor” effects (when unused databases cause latency or compete with active ones).
With fewer inactive databases on high-availability servers, your active databases run faster and more reliably.
To keep a database active, simply interact with it. Any of the following actions will reset its inactivity timer:
Performing any of these actions ensures the database will not be archived.
Restoring an archived database is quick and straightforward:
The system will start a background job to restore the database. You can track progress at any time on the Account Activity page.
What to expect:
Quota reminder: To unarchive a database, you will need enough space in your database quota. If you have already reached your limit, you may need to archive or delete another database before restoring.
Auto-Archiving helps you:
It is a simple, automated way to ensure your workspace stays efficient while protecting your data.
As always, please feel free to reach out to the Optilogic support team at support@optilogic.com for any questions or feedback.

The Auto-Archiving feature helps keep your account clean and efficient while ensuring Optilogic maintains a streamlined, cost-effective storage footprint. By automatically archiving inactive databases, we reduce unnecessary server load, improve overall performance, and free up space so you can always create new Cosmic Frog models or DataStar projects when you need them.
From your perspective, Auto-Archiving means less manual cleanup and more confidence that your account is organized, fast, and ready for your next project.
Archiving moves a database from an active state into long-term storage. Once archived:
Important: Auto-archiving does not delete your data. You are always in control and can restore an archived database back into an active state.
With Auto-Archiving, you do not need to manually track and archive inactive databases. Our system will automatically archive any database that has been inactive for 90 days.
The screenshot below shows the notifications you will receive when 1) there are databases in your account that meet the criteria for an auto-archive event and 2) once databases have been archived:
Now, we will take a look at the Notifications Page, which is opened using the pop-out icon in the in-app notification, described under bullet #4 above:
Clicking on the “View Items” link of a “Scheduled Database Archive” in-app notification (see bullet #5 of the first screenshot) will take you to a filtered view in the Cloud Storage application where you can see all the databases that will be auto-archived (note that this shows a different example with different databases to be archived as the previous screenshots):
This next screenshot shows the filter that is applied on the Databases tab:
Clicking on the “View Items” link of a “Databases Archived” in-app notification (see bullet #5 of the first screenshot) will again take you to a filtered view in the Cloud Storage application where you can see the databases that have been auto-archived:
Finally, the following screenshot shows the filter that was applied on the Archived Databases tab:
Archiving is not just about organization — it also enhances performance across the platform. By reducing the number of idle databases consuming system resources, we lower the likelihood of “noisy neighbor” effects (when unused databases cause latency or compete with active ones).
With fewer inactive databases on high-availability servers, your active databases run faster and more reliably.
To keep a database active, simply interact with it. Any of the following actions will reset its inactivity timer:
Performing any of these actions ensures the database will not be archived.
Restoring an archived database is quick and straightforward:
The system will start a background job to restore the database. You can track progress at any time on the Account Activity page.
What to expect:
Quota reminder: To unarchive a database, you will need enough space in your database quota. If you have already reached your limit, you may need to archive or delete another database before restoring.
Auto-Archiving helps you:
It is a simple, automated way to ensure your workspace stays efficient while protecting your data.
As always, please feel free to reach out to the Optilogic support team at support@optilogic.com for any questions or feedback.


